.png)
Access and login
URLs to access the Customer Service Desk:
https://servicedesk.censhare.com
https://helpcenter.censhare.com
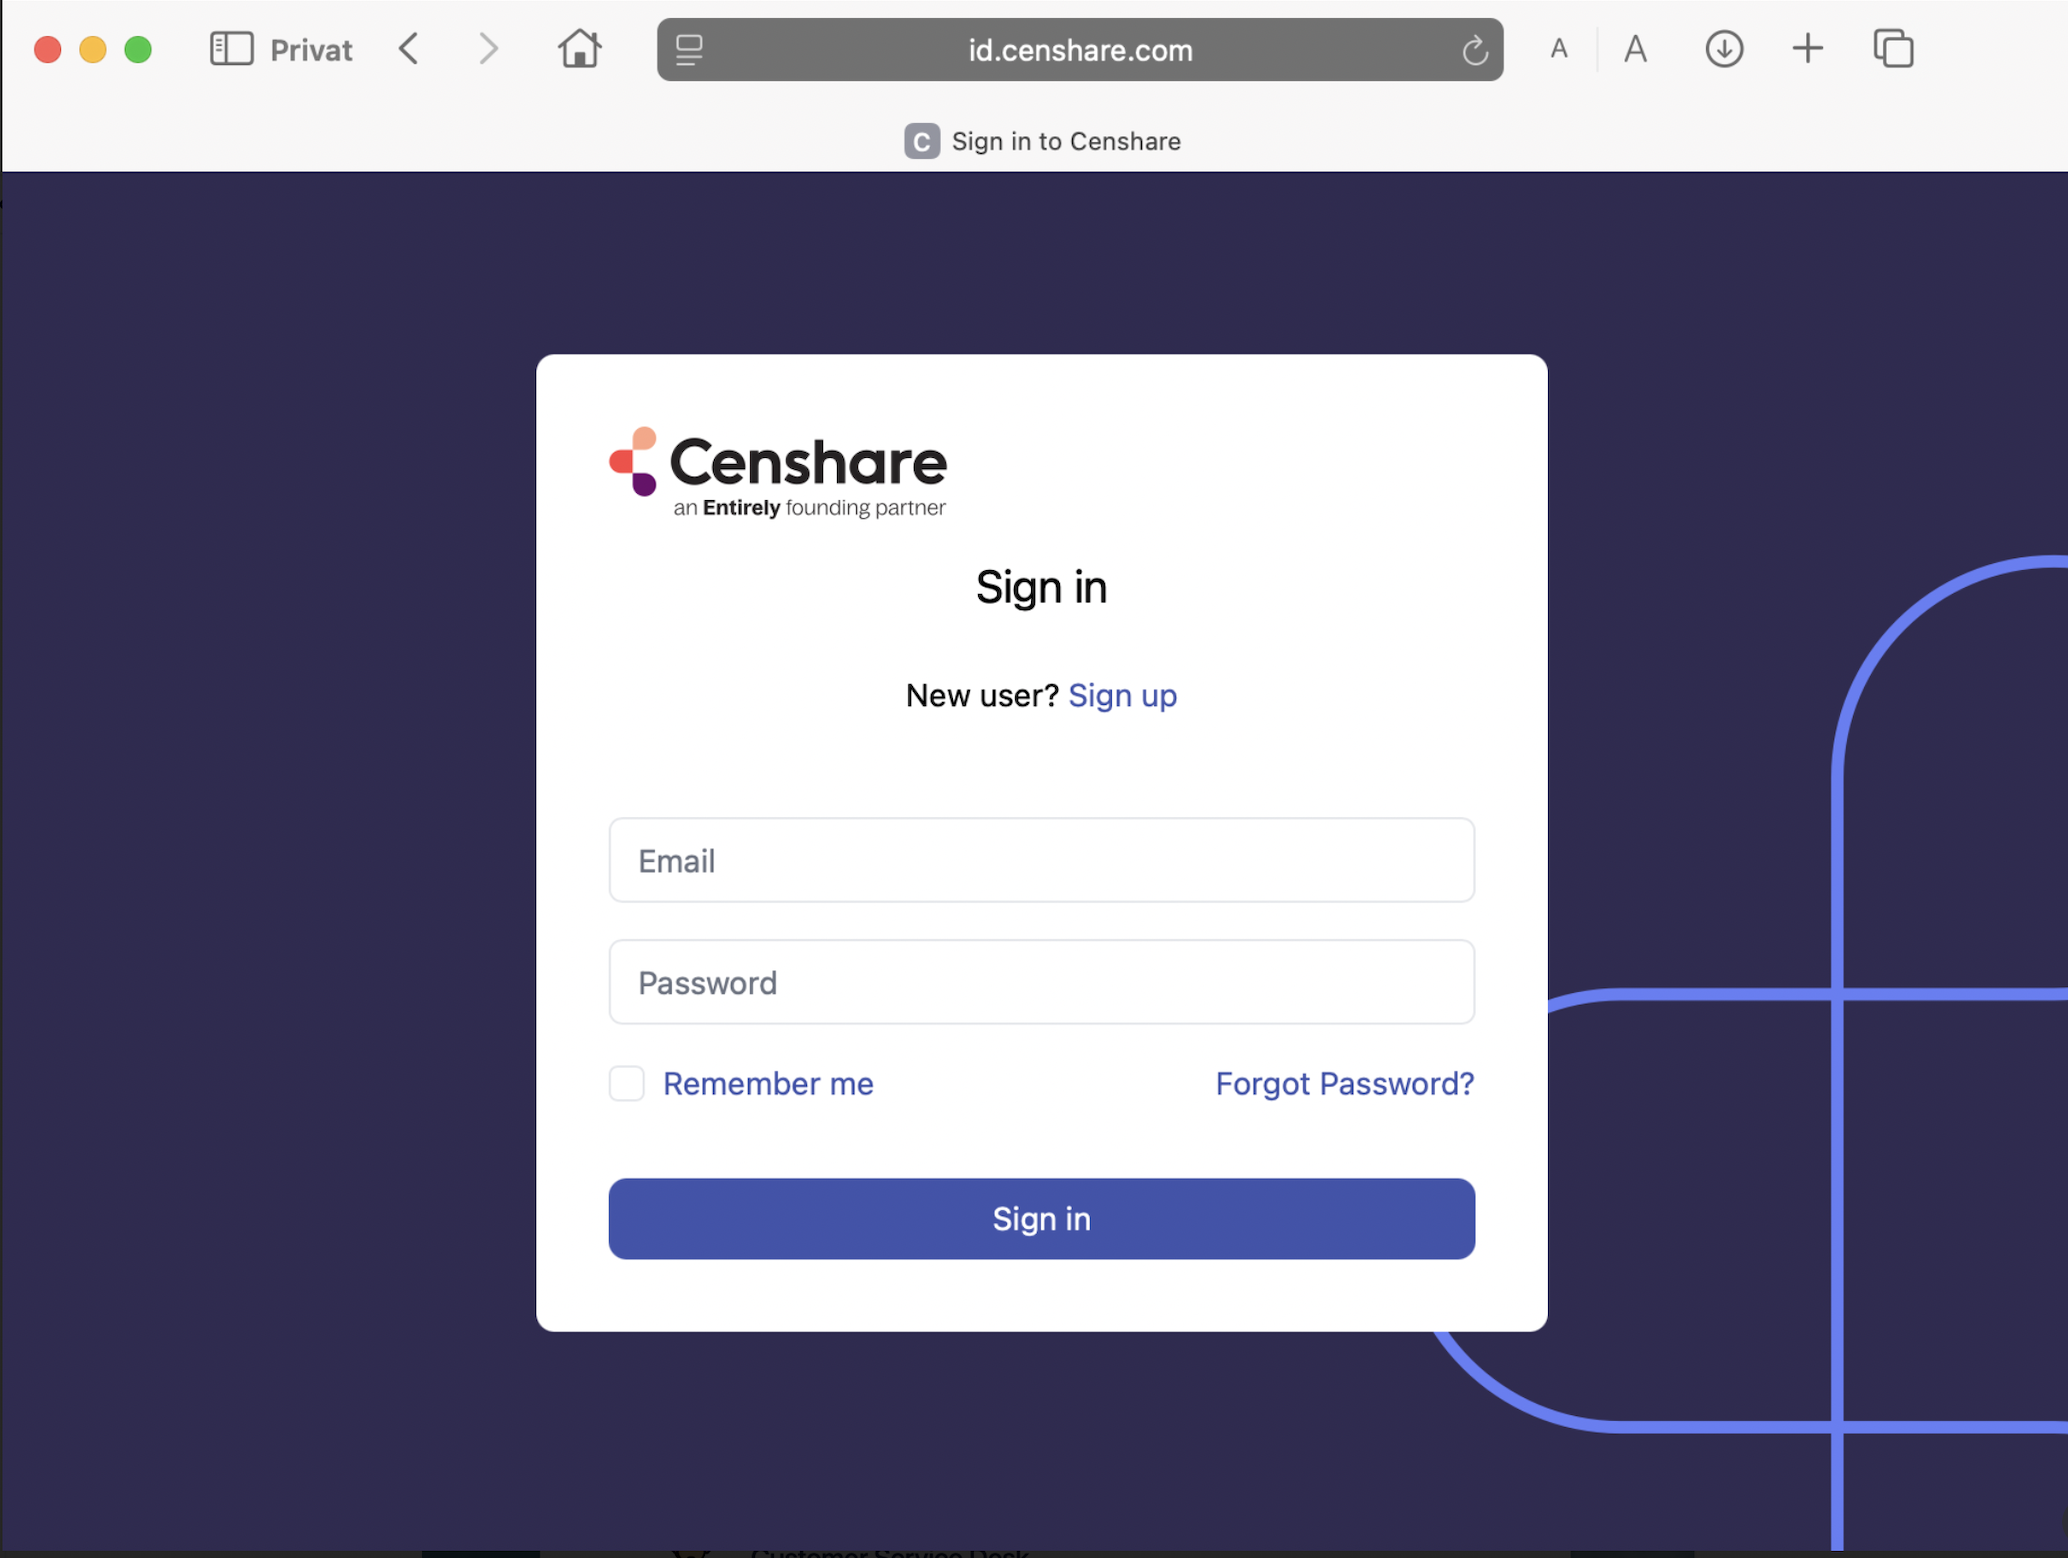
Login to the Portal
Open the connection URL and insert your account data.
No account data yet? Sign up for an account!
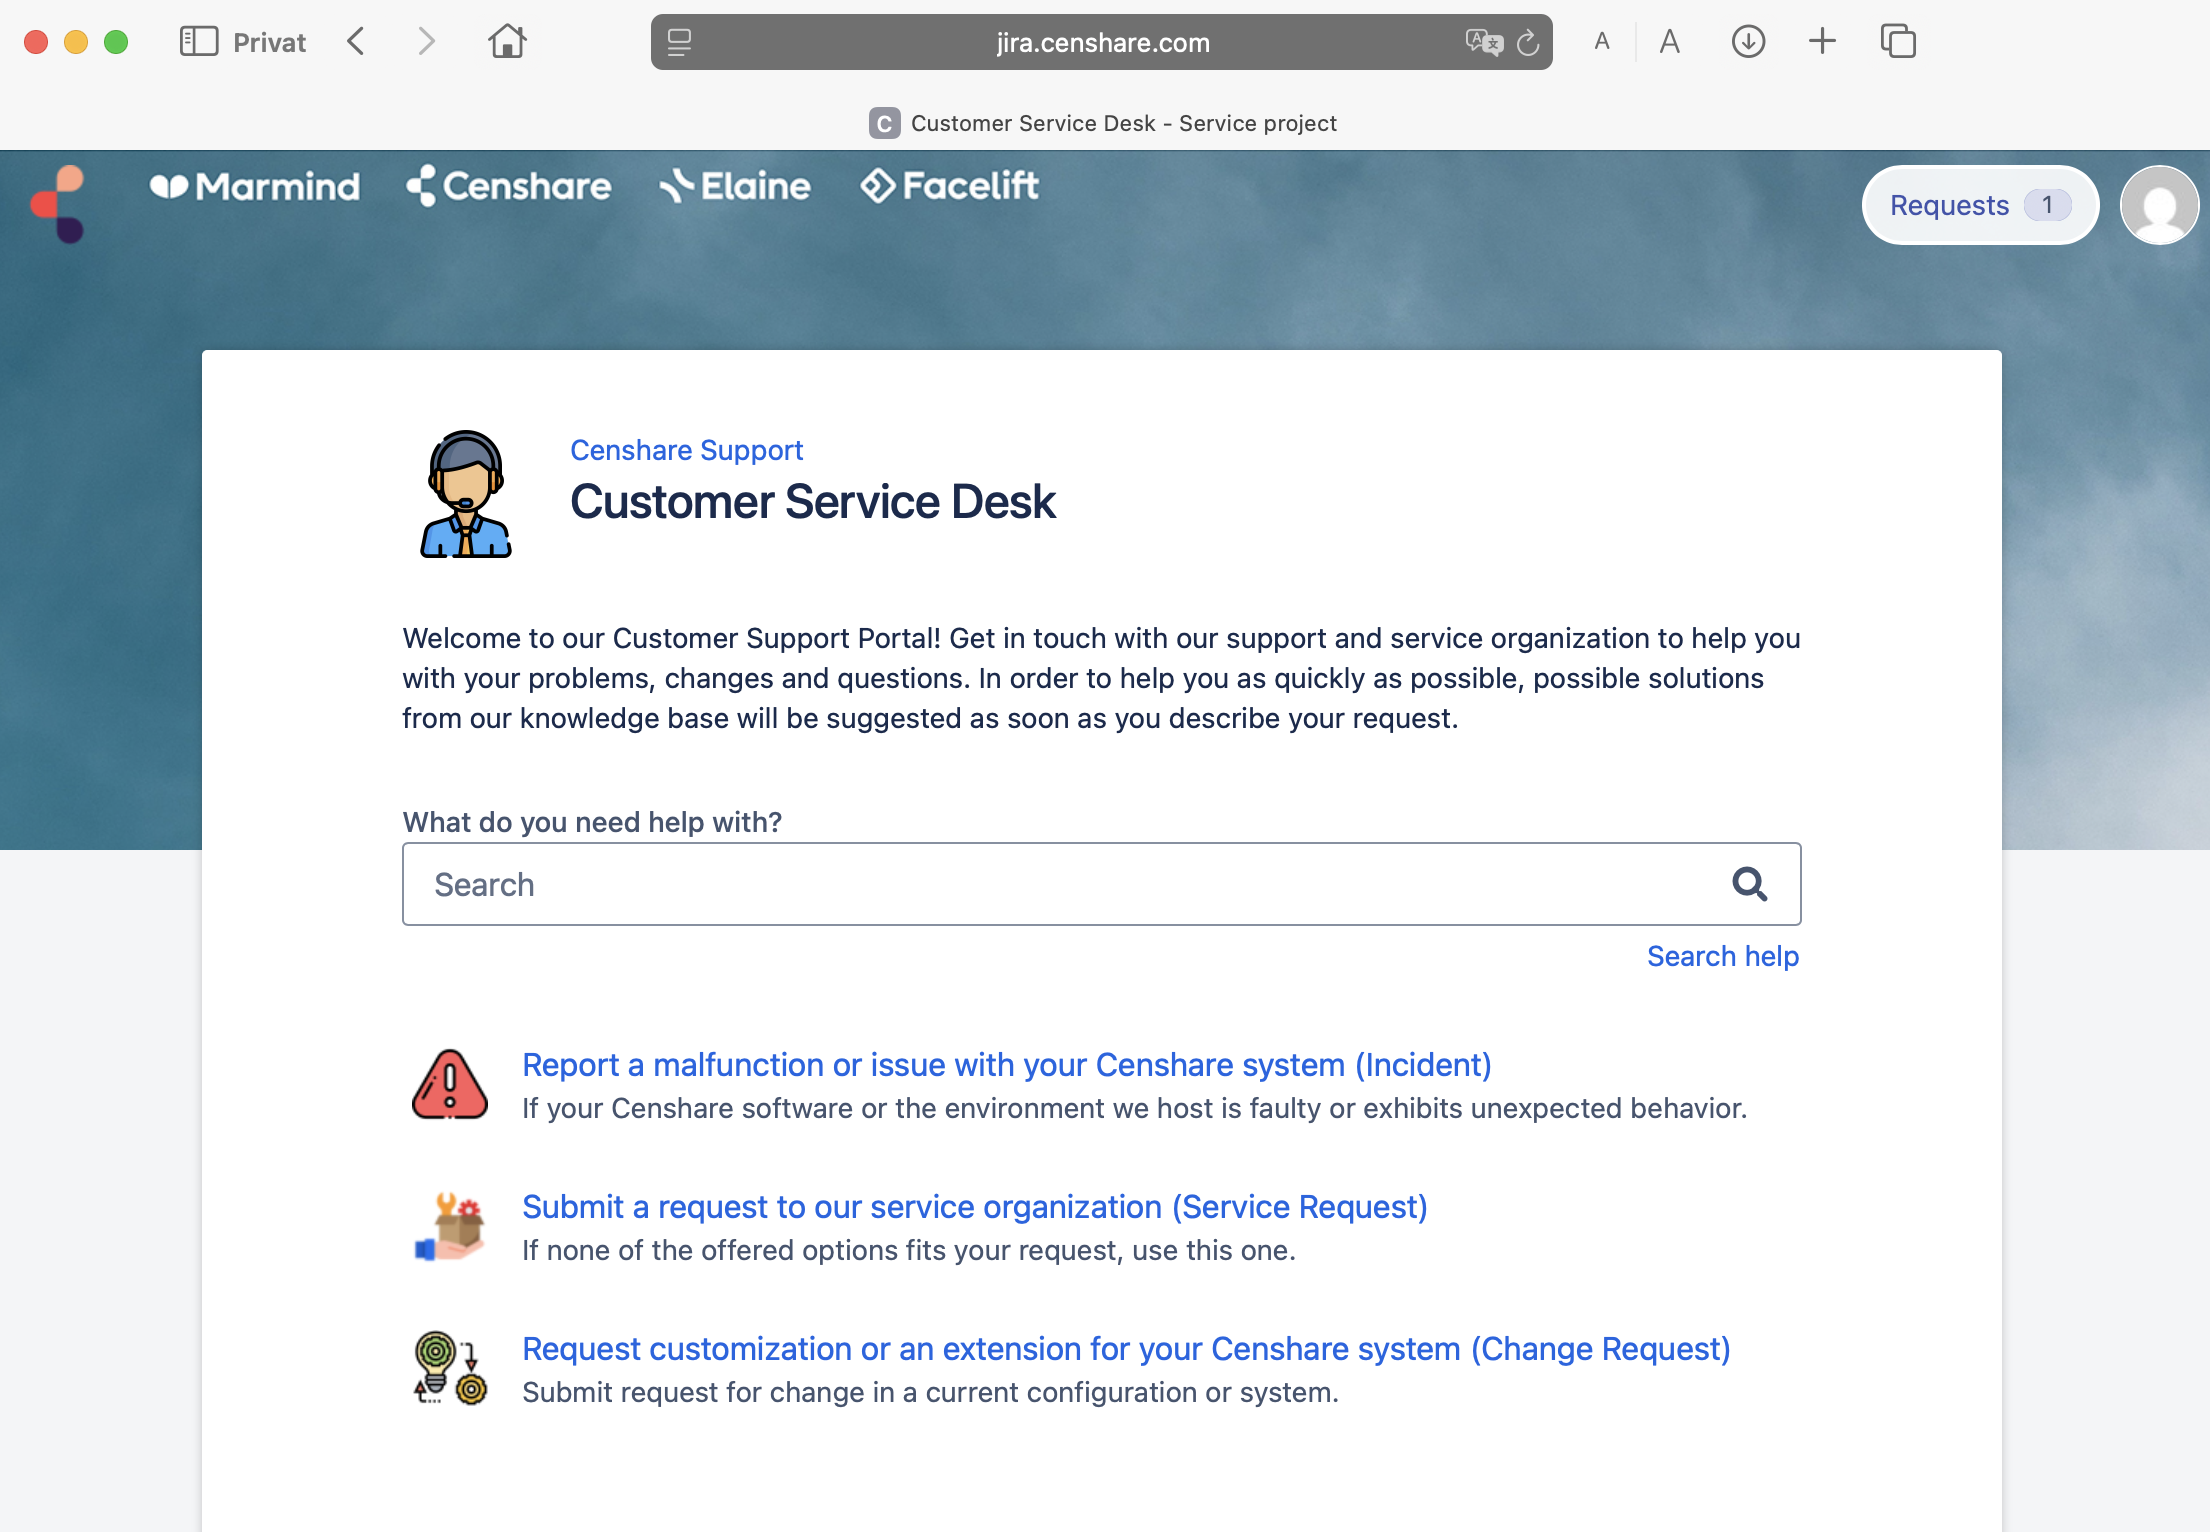
The Customer Service Desk main screen
Video content available Customer Service Desk Video Tutorials
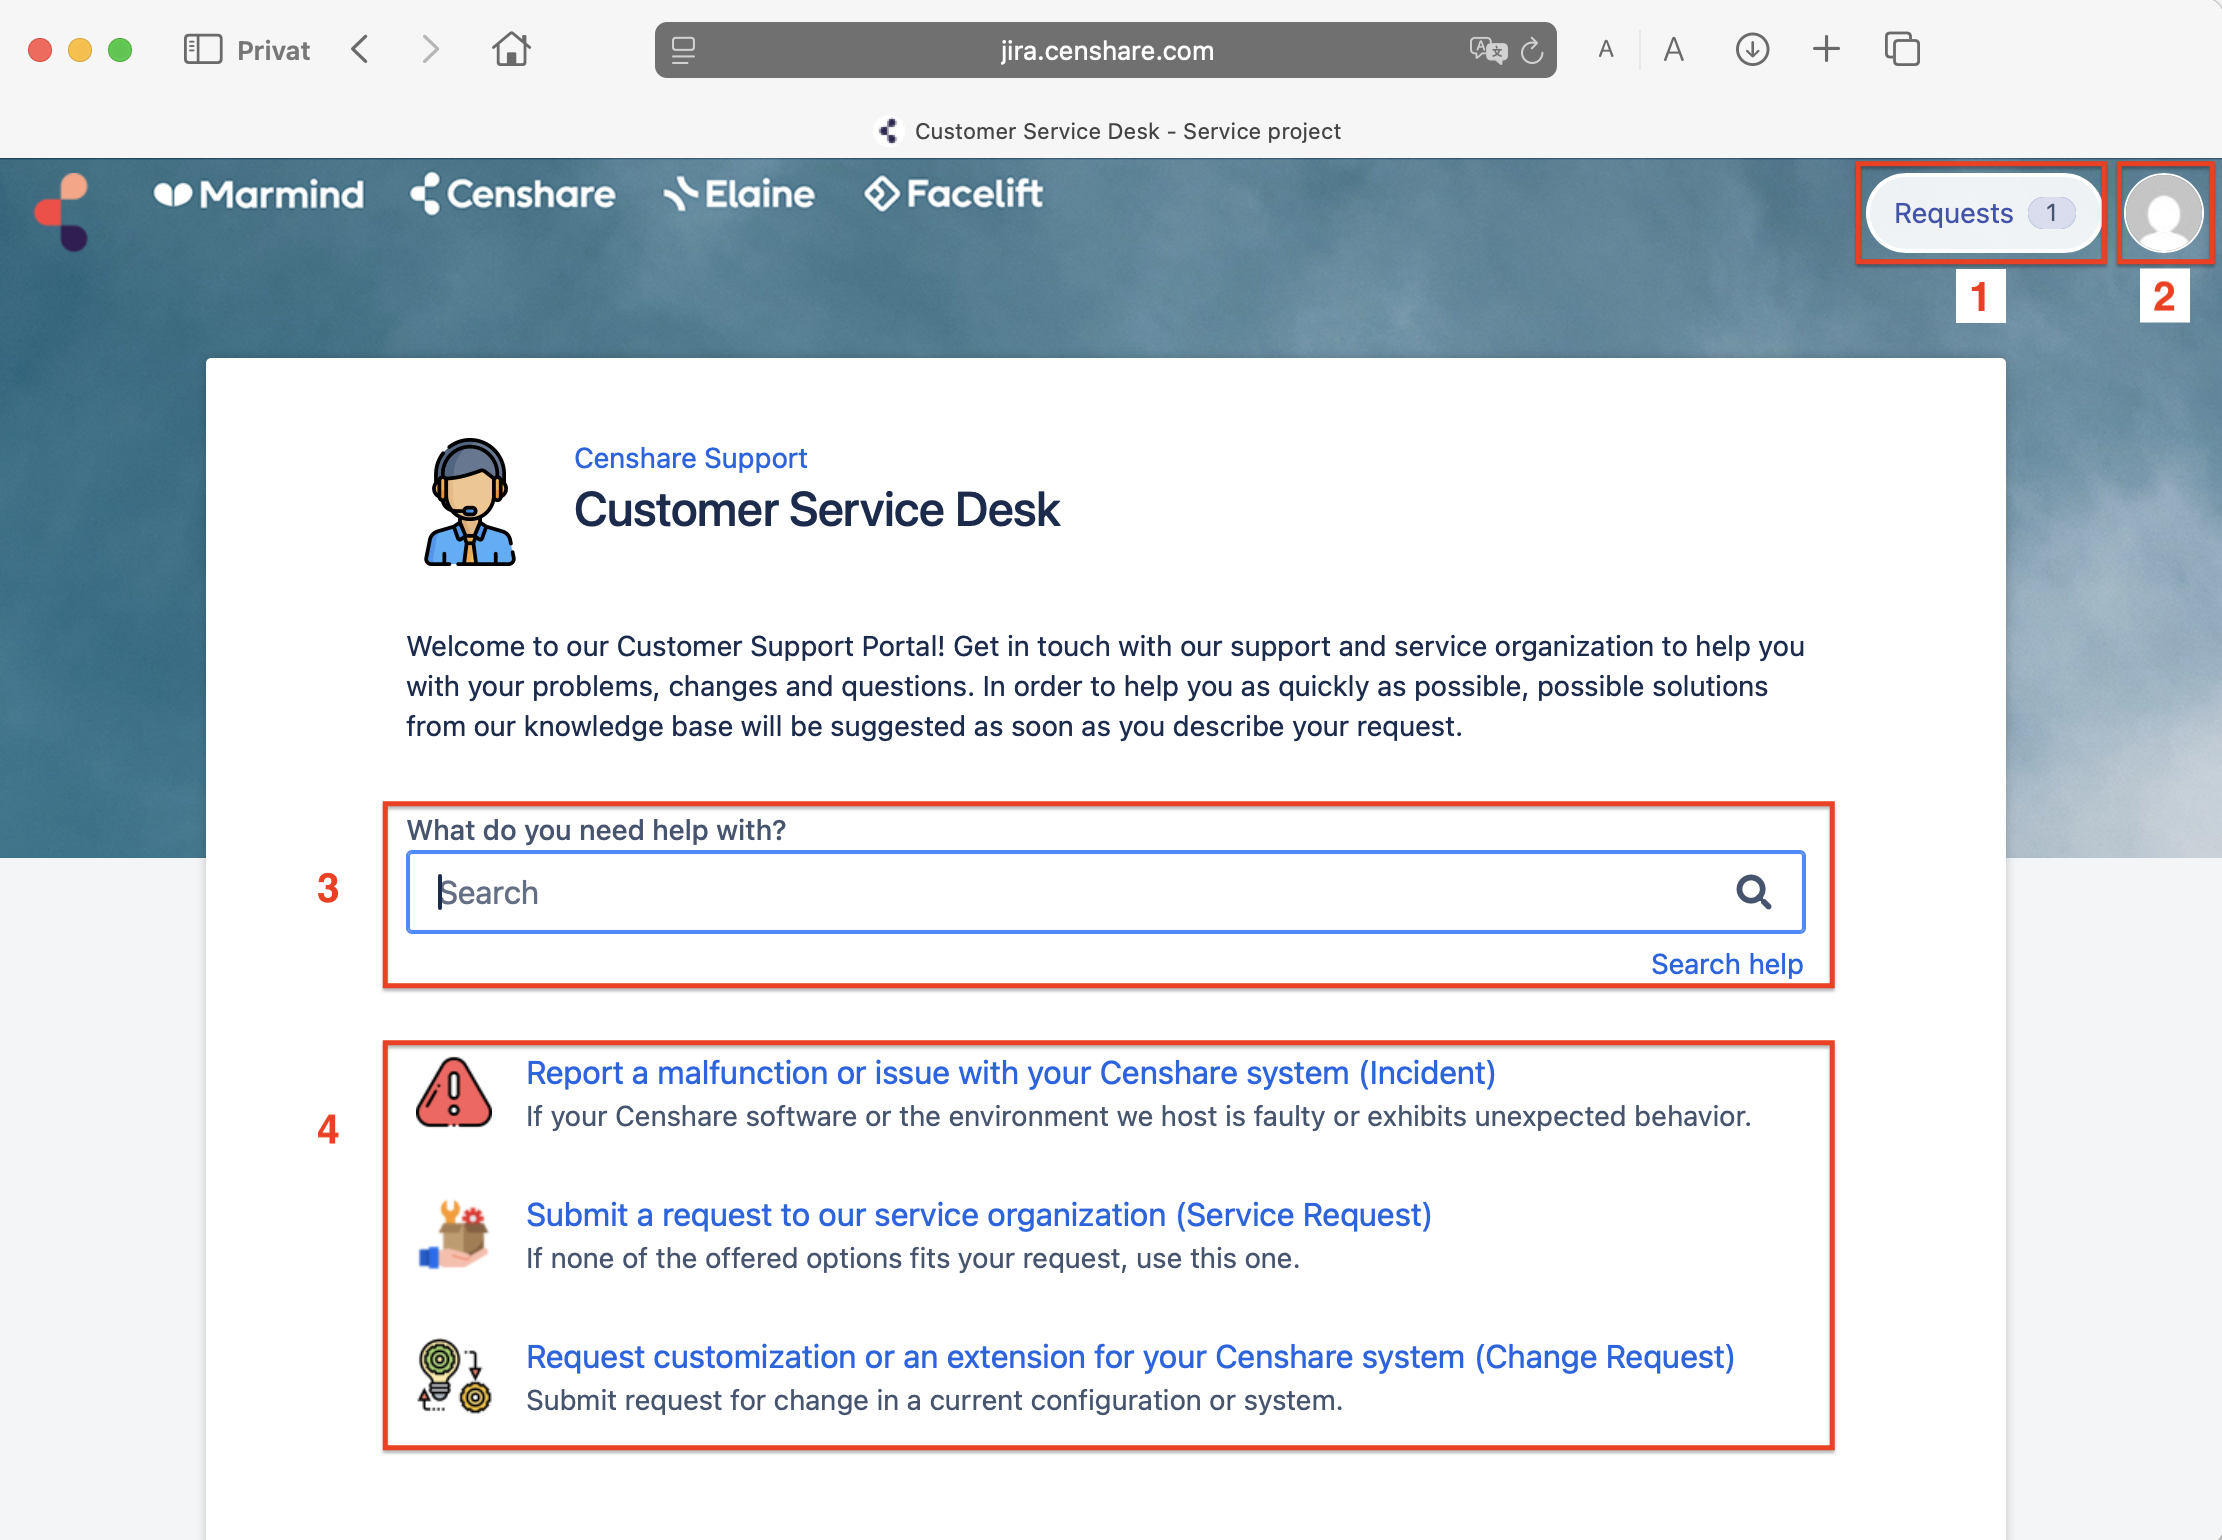
The portal shows four different areas:
-
"Requests" will navigate you to the requests area where you can see and work with all your requests.
-
Access to your user profile
-
Search option
-
A list of the available request types. Since the available request types depend on your role, it may look different.
1. Your requests
2. Your user profile
3. Search option
Allows customer users to search for request types and Knowledge base articles.
4. The request types
Report a malfunction or problem with your Censhare system (Incident)
Submit a request to our service organization (Service Request)
Request customization or an extension for your Censhare system (Change Request)
Create requests
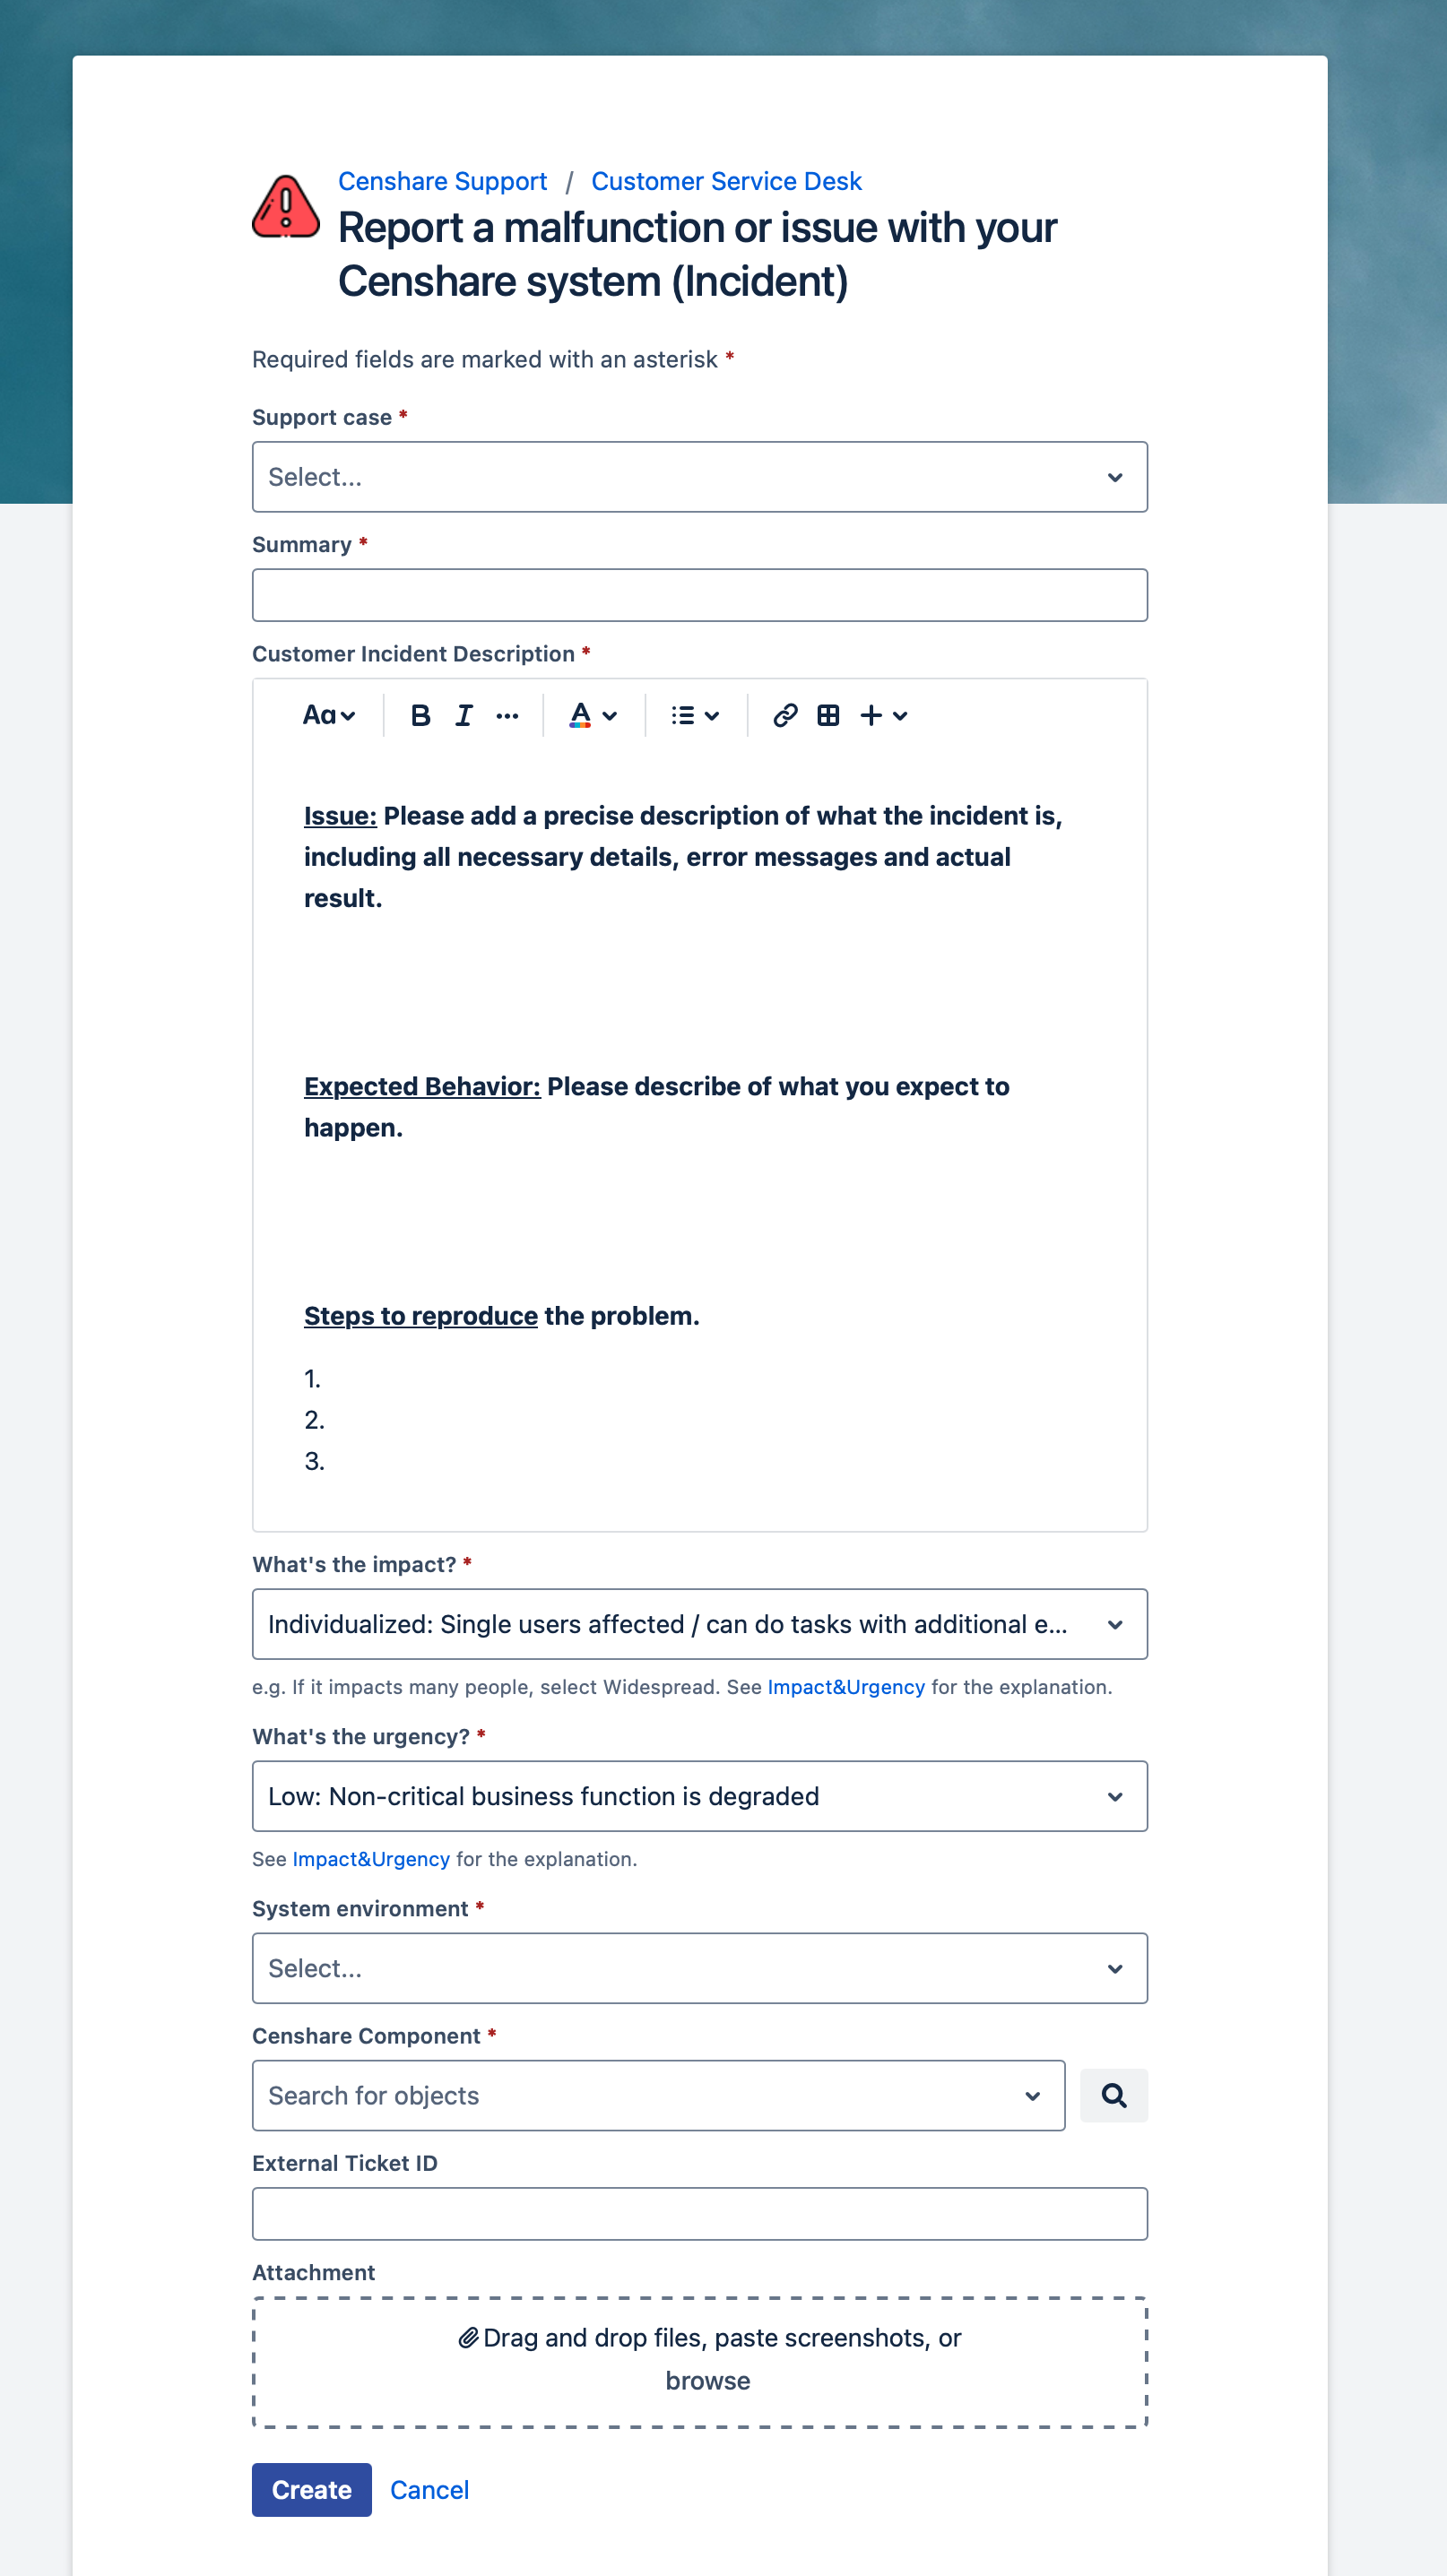
Incident
Report a malfunction or problem with your Censhare system (Incident)
Video content available Customer Service Desk Video Tutorials
Use it if your Censhare software or the environment we support is faulty or exhibits unexpected behavior.
Customer User form:
Partner users form has additional info on top:
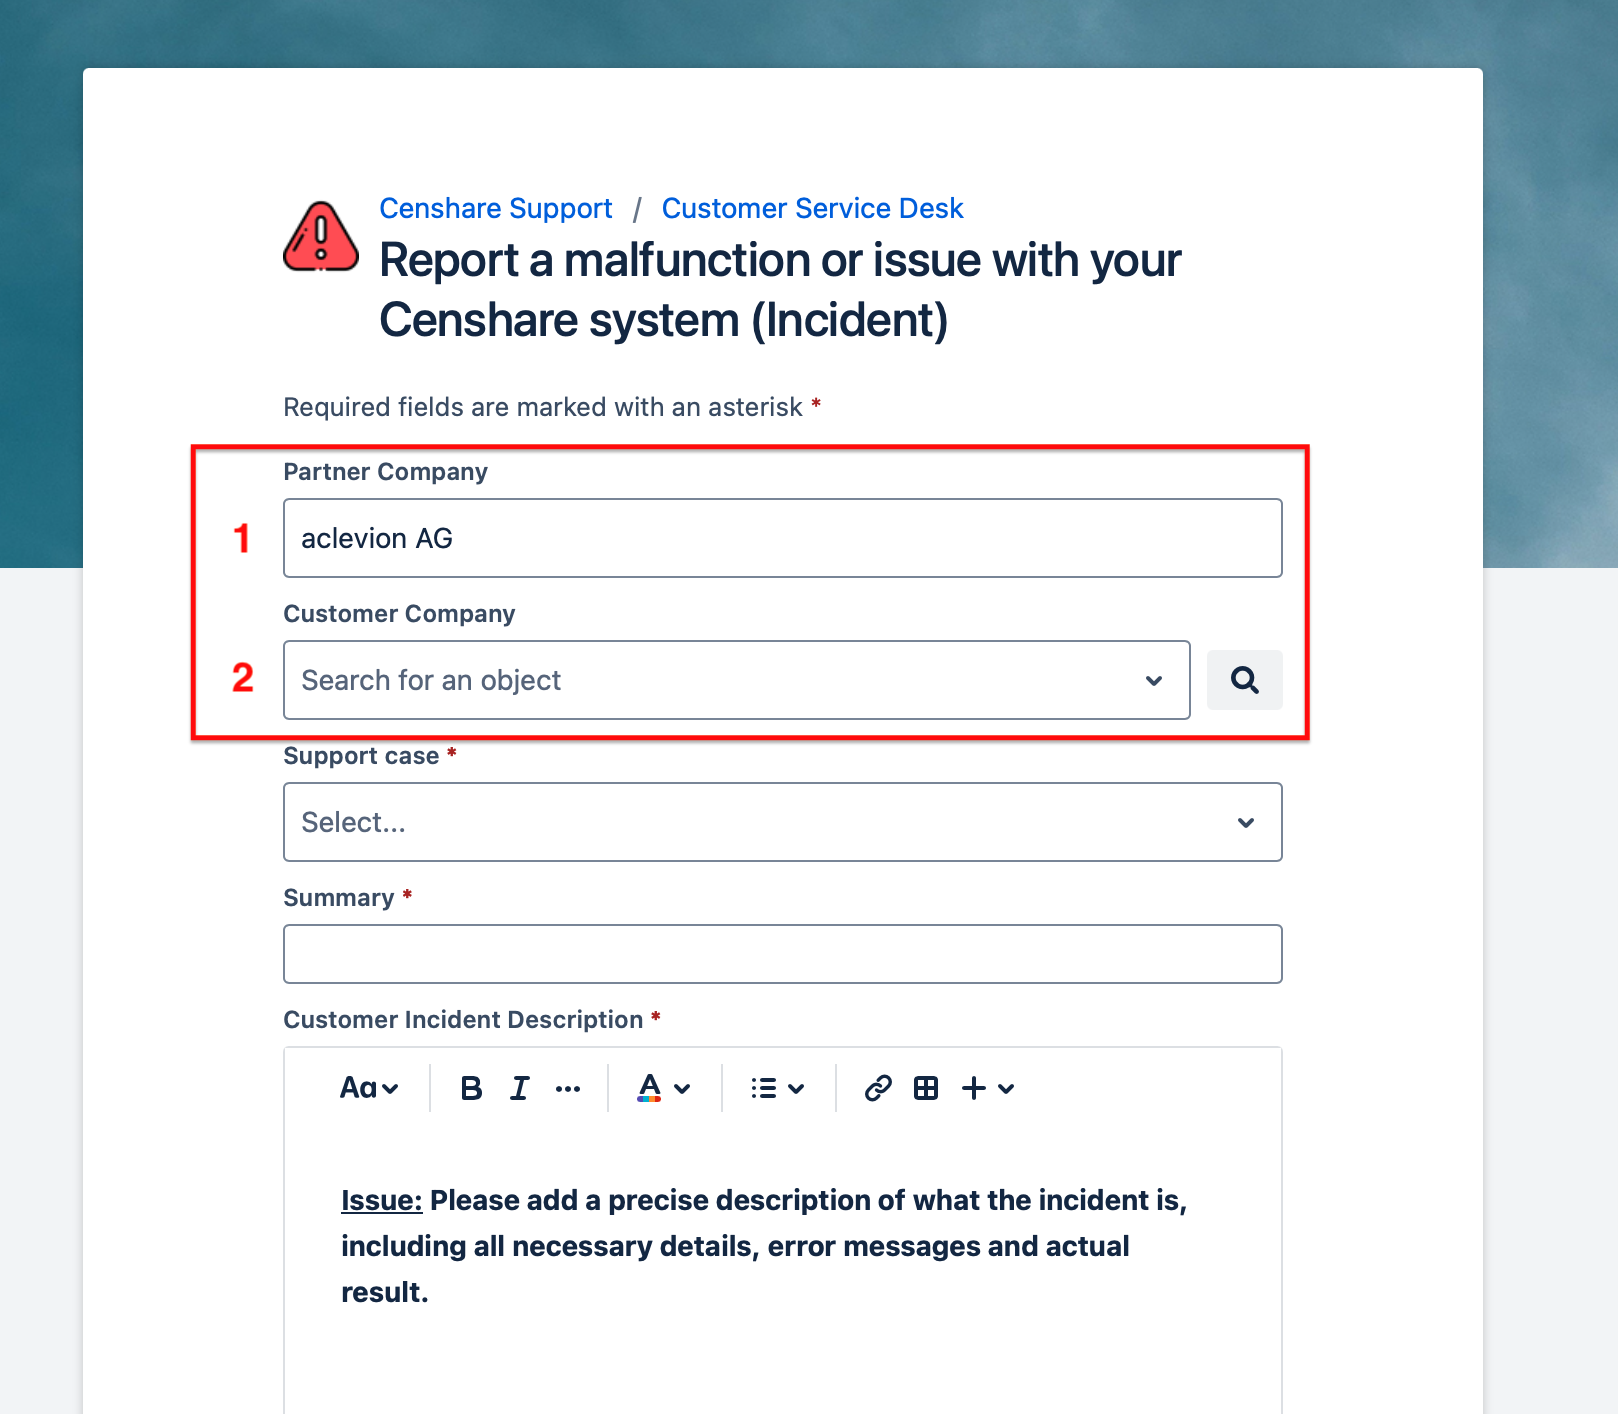
-
Partner Company: Displays the partner company to which the requesting user belongs. This field is automatically pre-populated based on the user's login information.
-
Customer Company: In the field, the partner user selects the customer to which this request belongs. This is a pop-up window and the customer companies are displayed based on the contract information.
1. Support case
3 different cases to determines the resulting service contract *
Based on this support case selection by the user, the correct service contract will be assigned to the Incident.
Since a customer may have multiple service contracts in place with different response times, the selection is needed to identify the correct SLA and assign it to the ticket.
Select one of the 3 support cases first:
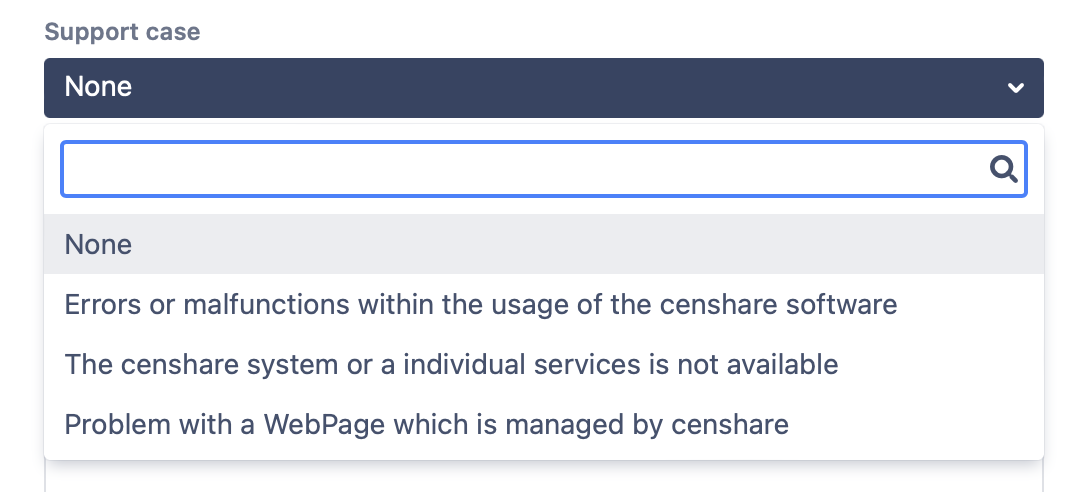
Case 1: "Errors or malfunctions within the usage of the Censhare software"
Indicates an application problem. No further refinement pop-up is displayed after this selection.
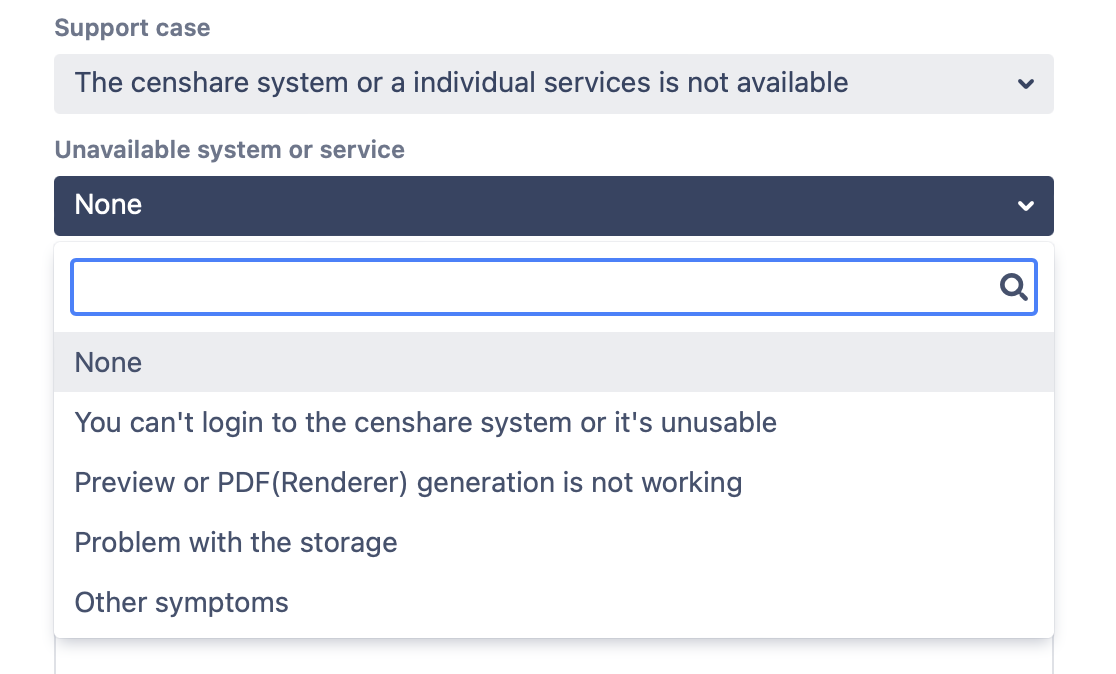
Case 2: "The Censhare systems or an individual service is not available"
Indicates an operations problem. This refinement pop-up is displayed after the selection:
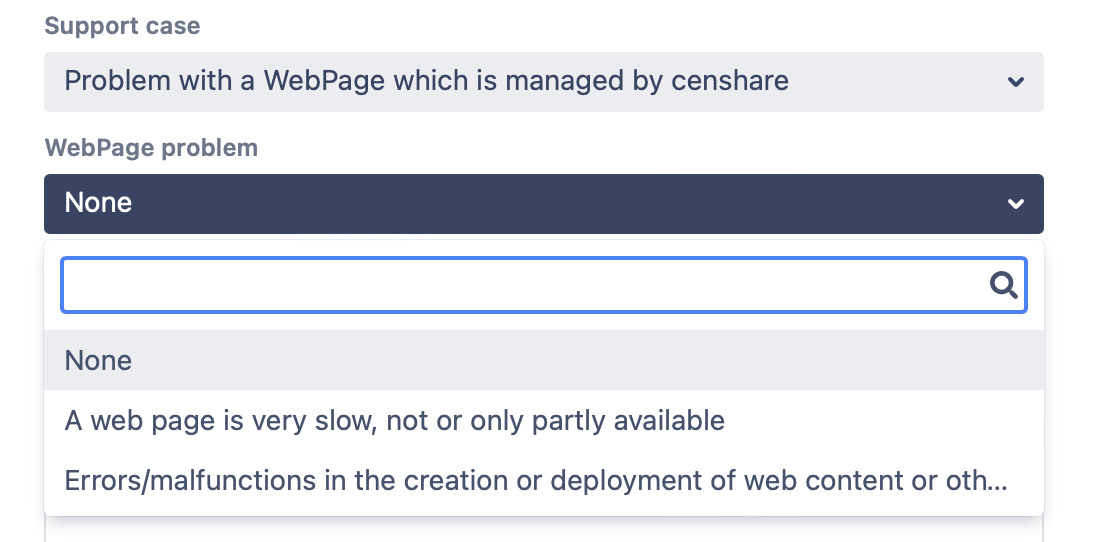
Case 3 "Problem with a WebPage which is managed by censhare"
Indicates a problem with an Online Channel or HCMS. This refinement pop-up is displayed after the selection:
2. Summary *
Short and brief headline for your request
3. Customer Incident Description *
Describe your request in an understandable way in the form of:
-
what are you doing
-
what is the expected result
-
what do you get as the result
4. What is the Impact & What is the Urgency *
Based on the user selection in these 2 fields, we calculate the priority of your request based on ITIL standard method.
5. System environment *
Select the environment the request belongs too. Possible selections are Production, Non-production or both.
6. Censhare Component *
Select the affected component from the pop-up. Multi selection is possible.
If you select components that are connected to Adobe InDesign/InCopy, an additional field for the CC-Version will be displayed.
7. External ID
You can use this field for your own reference.
8. Attachment
Add helpful information via drag & drop.
(* refers to a mandatory field)
Service Request
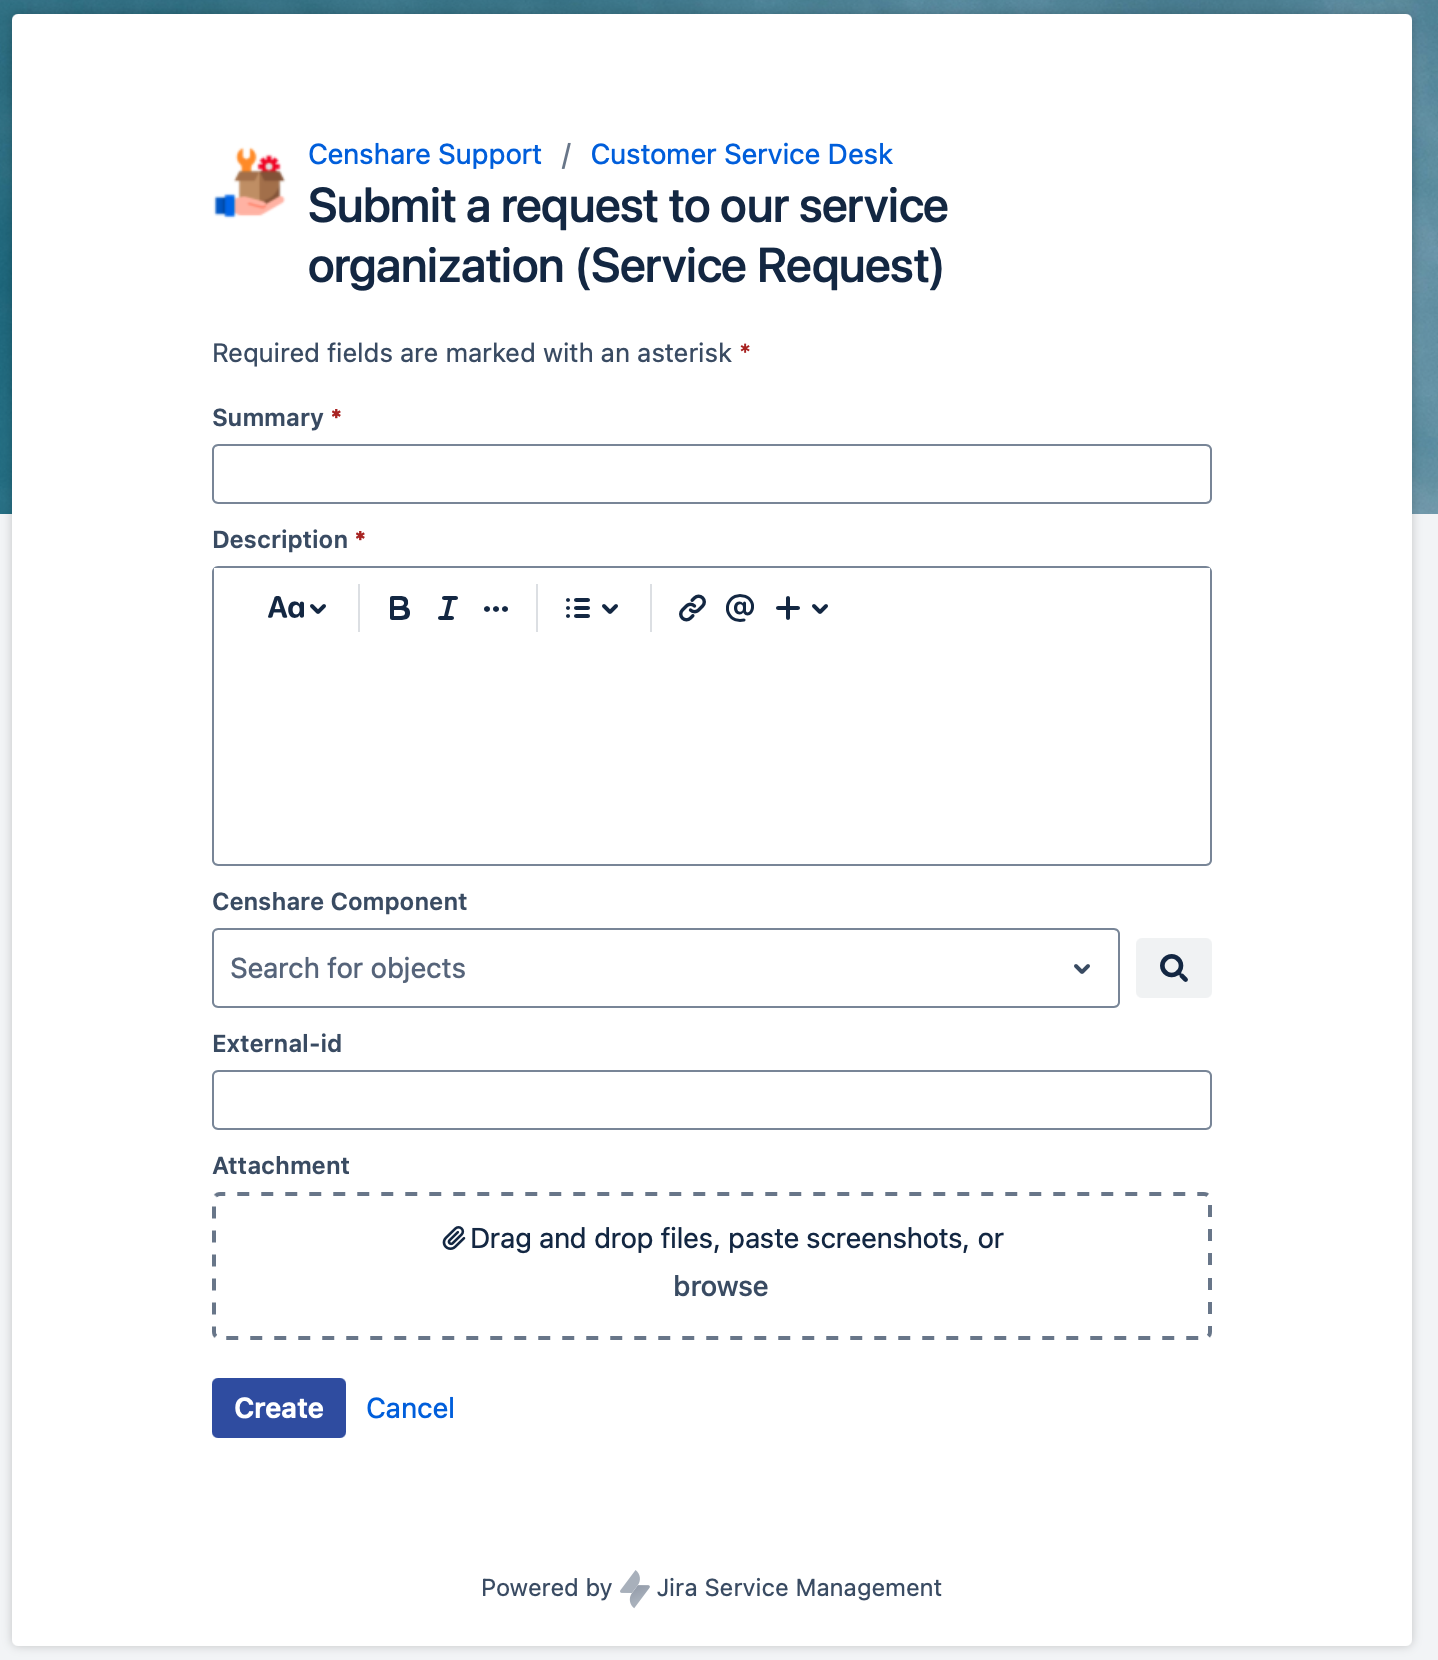
Submit a request to our service organization (Service Request)
Video content available Customer Service Desk Video Tutorials
If none of the offered options fits your request, use this one.
Customer User form:
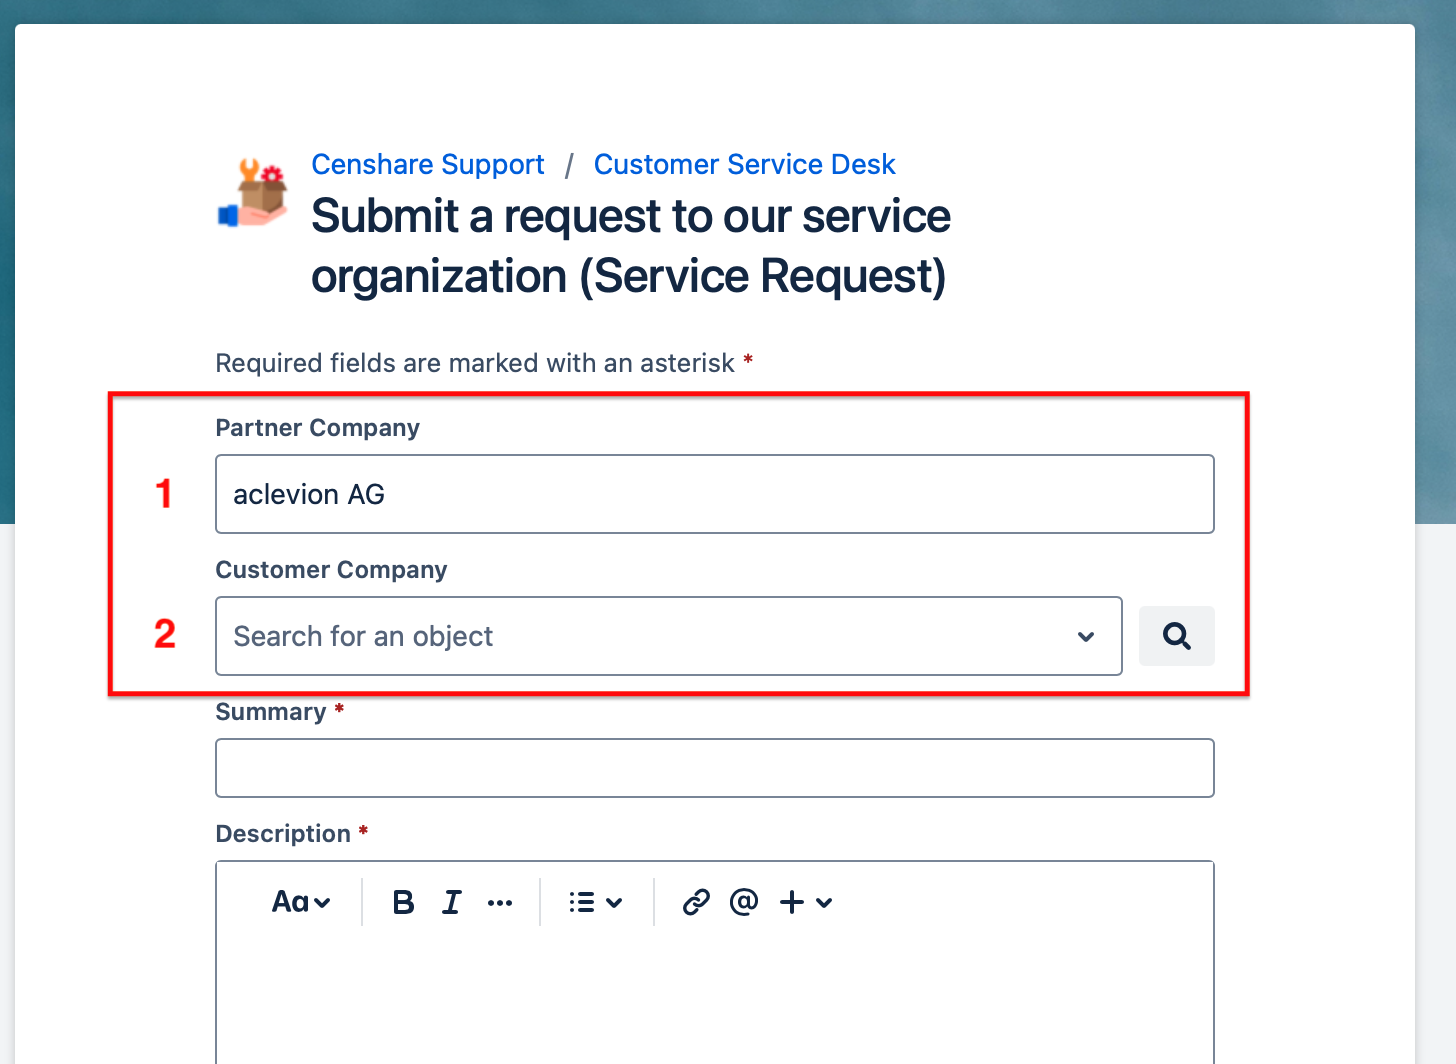
Partner users form has additional info on top:
-
Partner Company: Displays the partner company to which the requesting user belongs. This field is automatically pre-populated based on the user's login information.
-
Customer Company: In the field, the partner user selects the customer to which this request belongs. This is a pop-up window and the customer companies are displayed based on the contract information.
1. The Summary *
Short and brief headline for your request
2. Description *
Describe your request in an understandable way.
3. Censhare Component
Select the affected component from the pop-up.
4. External ID
You can use this edit field for your own reference opionally
5. Attachment
Add helpful information via drag & drop.
(* refers to a mandatory field)
Change Request
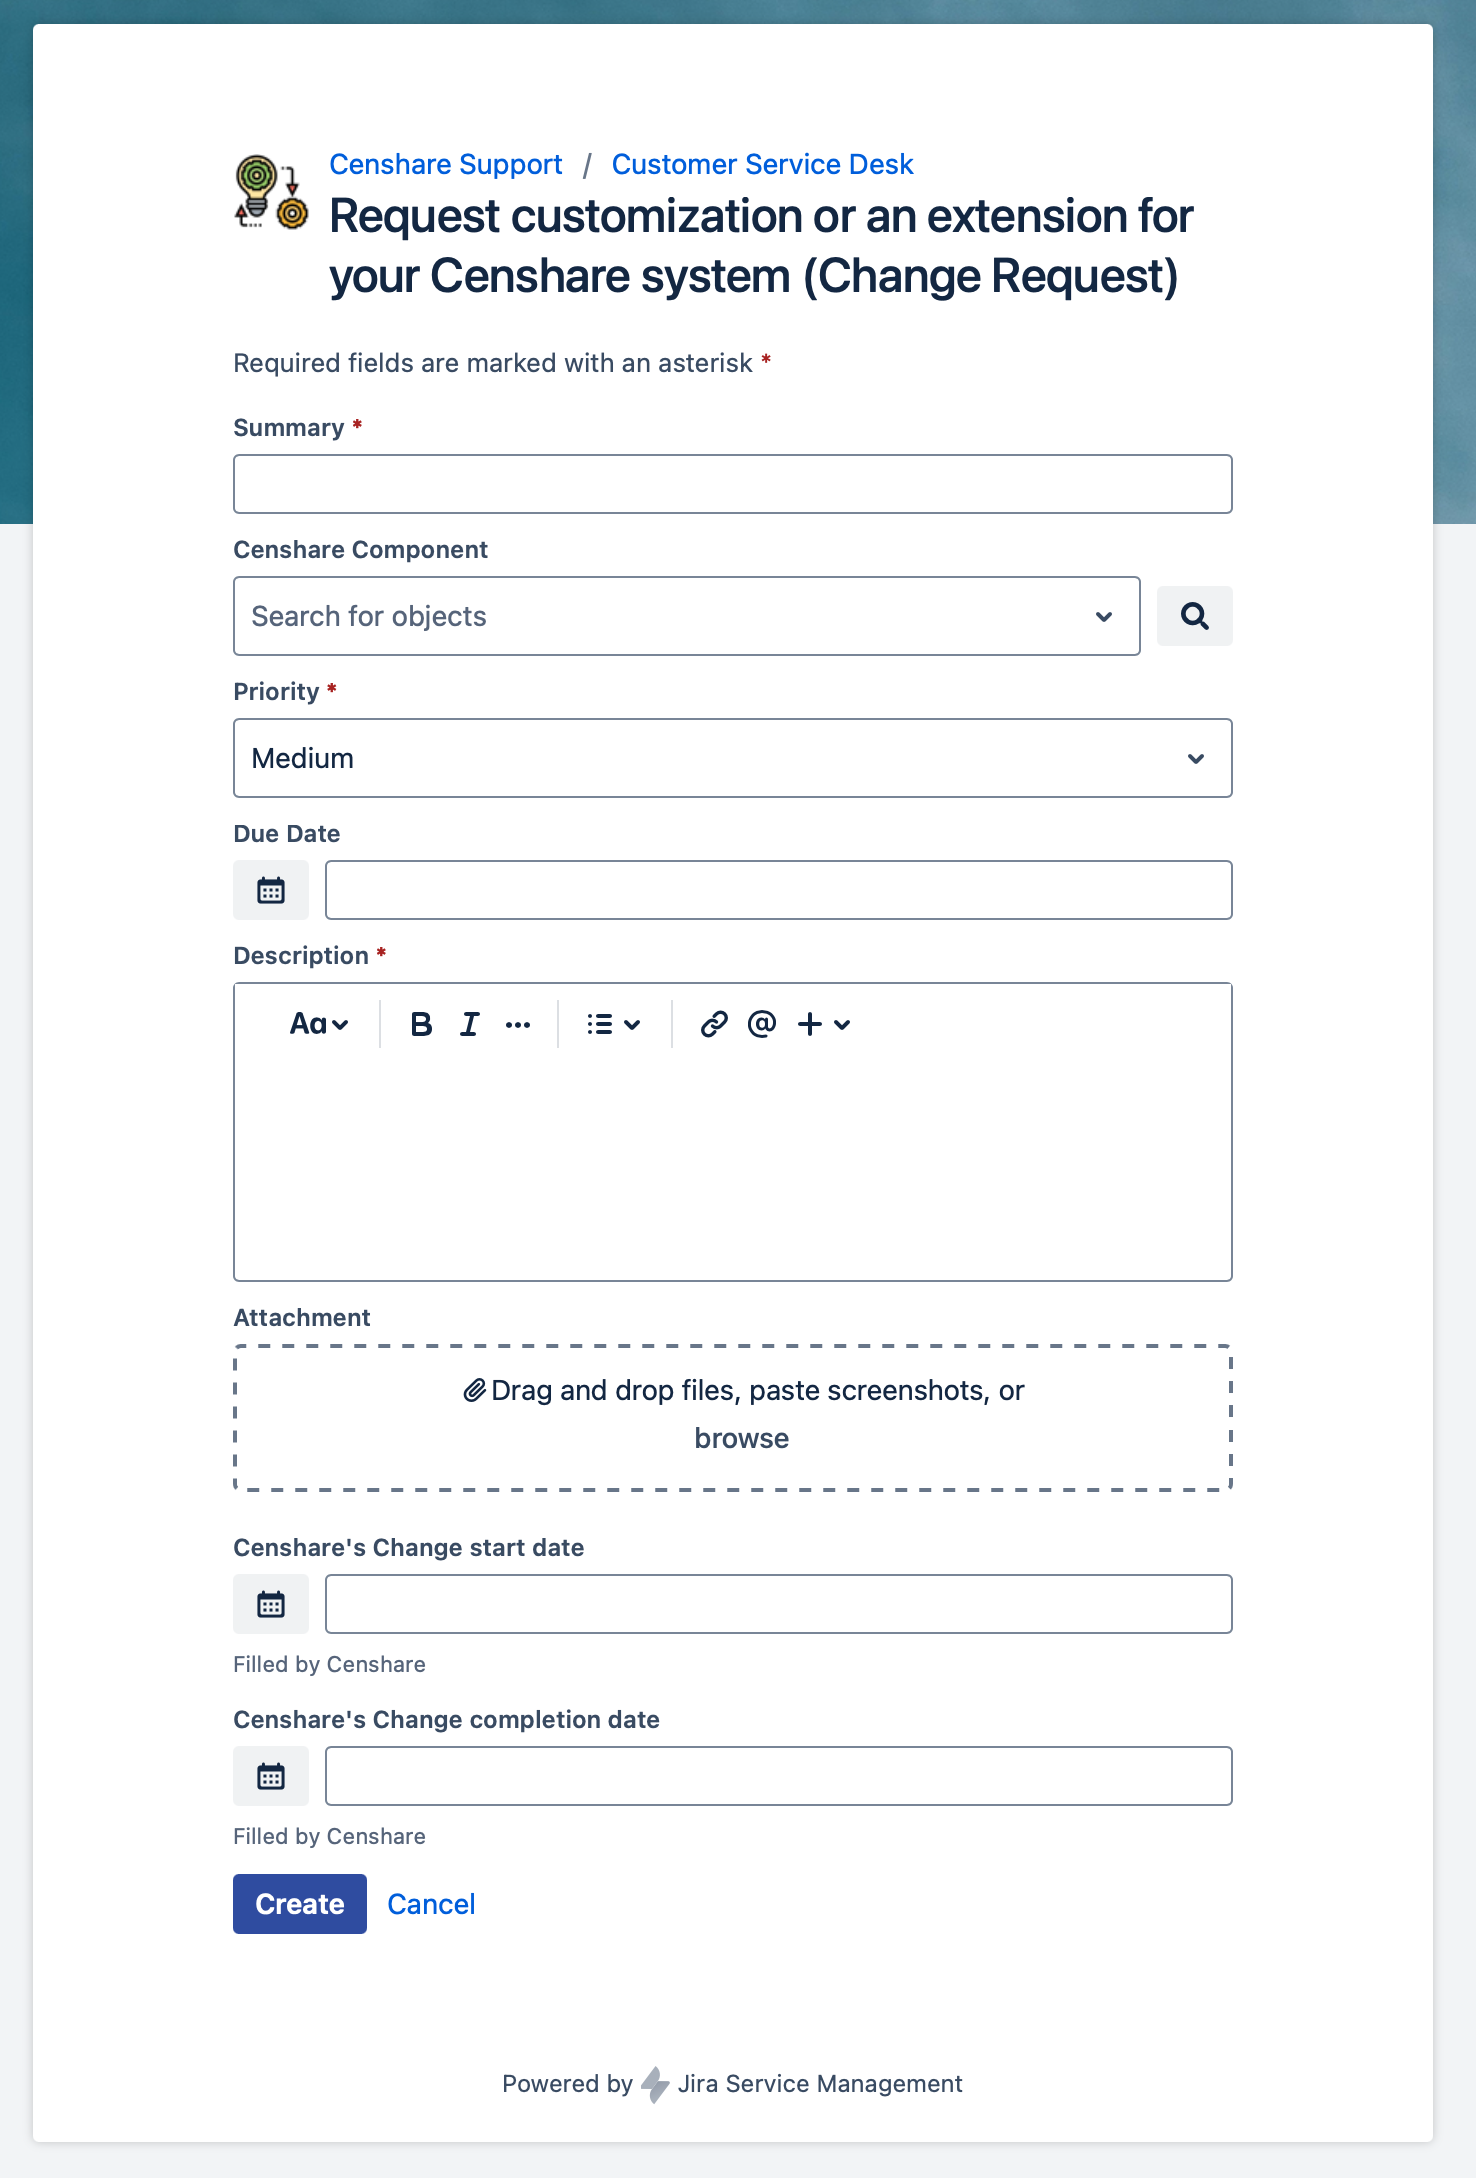
Request customization or an extension for your Censhare system (Change Request)
Submit request for a change in a current configuration or system.
Customer User form:
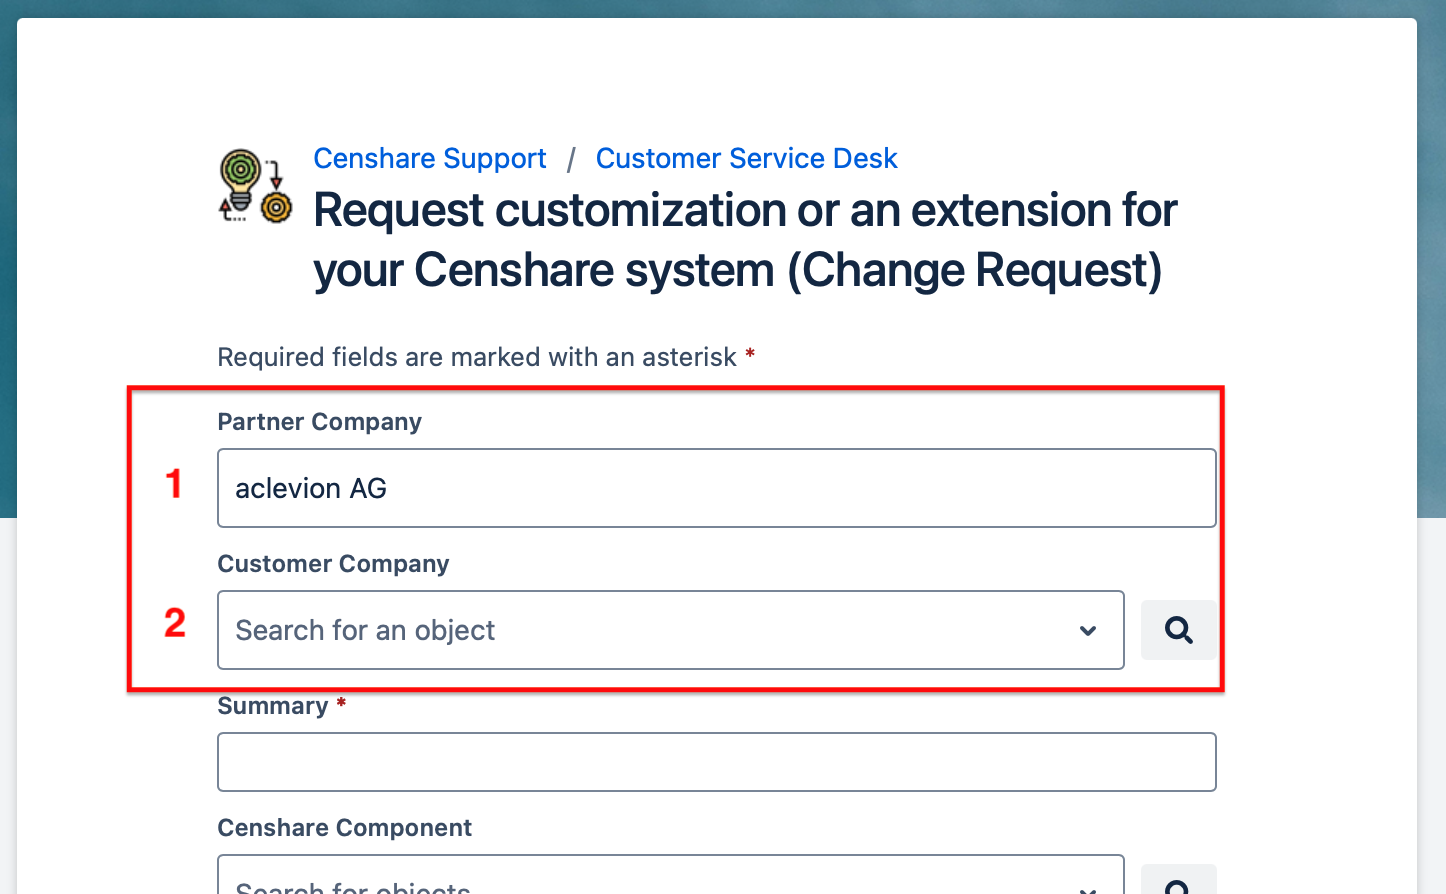
Partner users form has additional info on top:
-
Partner Company: Displays the partner company to which the requesting user belongs. This field is automatically pre-populated based on the user's login information.
-
Customer Company: In the field, the partner user selects the customer to which this request belongs. This is a pop-up window and the customer companies are displayed based on the contract information.
1. The Summary *
Short and brief headline for your request
2. Censhare Component
Select the affected component from the pop-up.
3. Priority *
Select priority "Critical, High, Medium, or Low".
4. Due Date
If you have a due date, select it.
5. Description *
Describe your request in an understandable way.
6. Attachment
Add helpful information via drag & drop.
Working with your Requests in the Support Portal
Find your existing requests in the Portal
Click the "Requests" button at the top right corner at the portal.
A small pop-up will be shown where you can select what requests you will see in the next window:
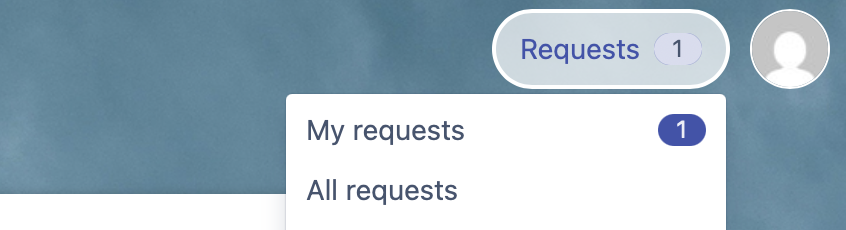
My request:
Will show all requests created by you.
All requests:
It shows all requests you have access to.
These requests were created by the members of the support group or were shared with the support group you are a member of..
Request area: After the selection you are in the requests area and see the tickets according your selection.
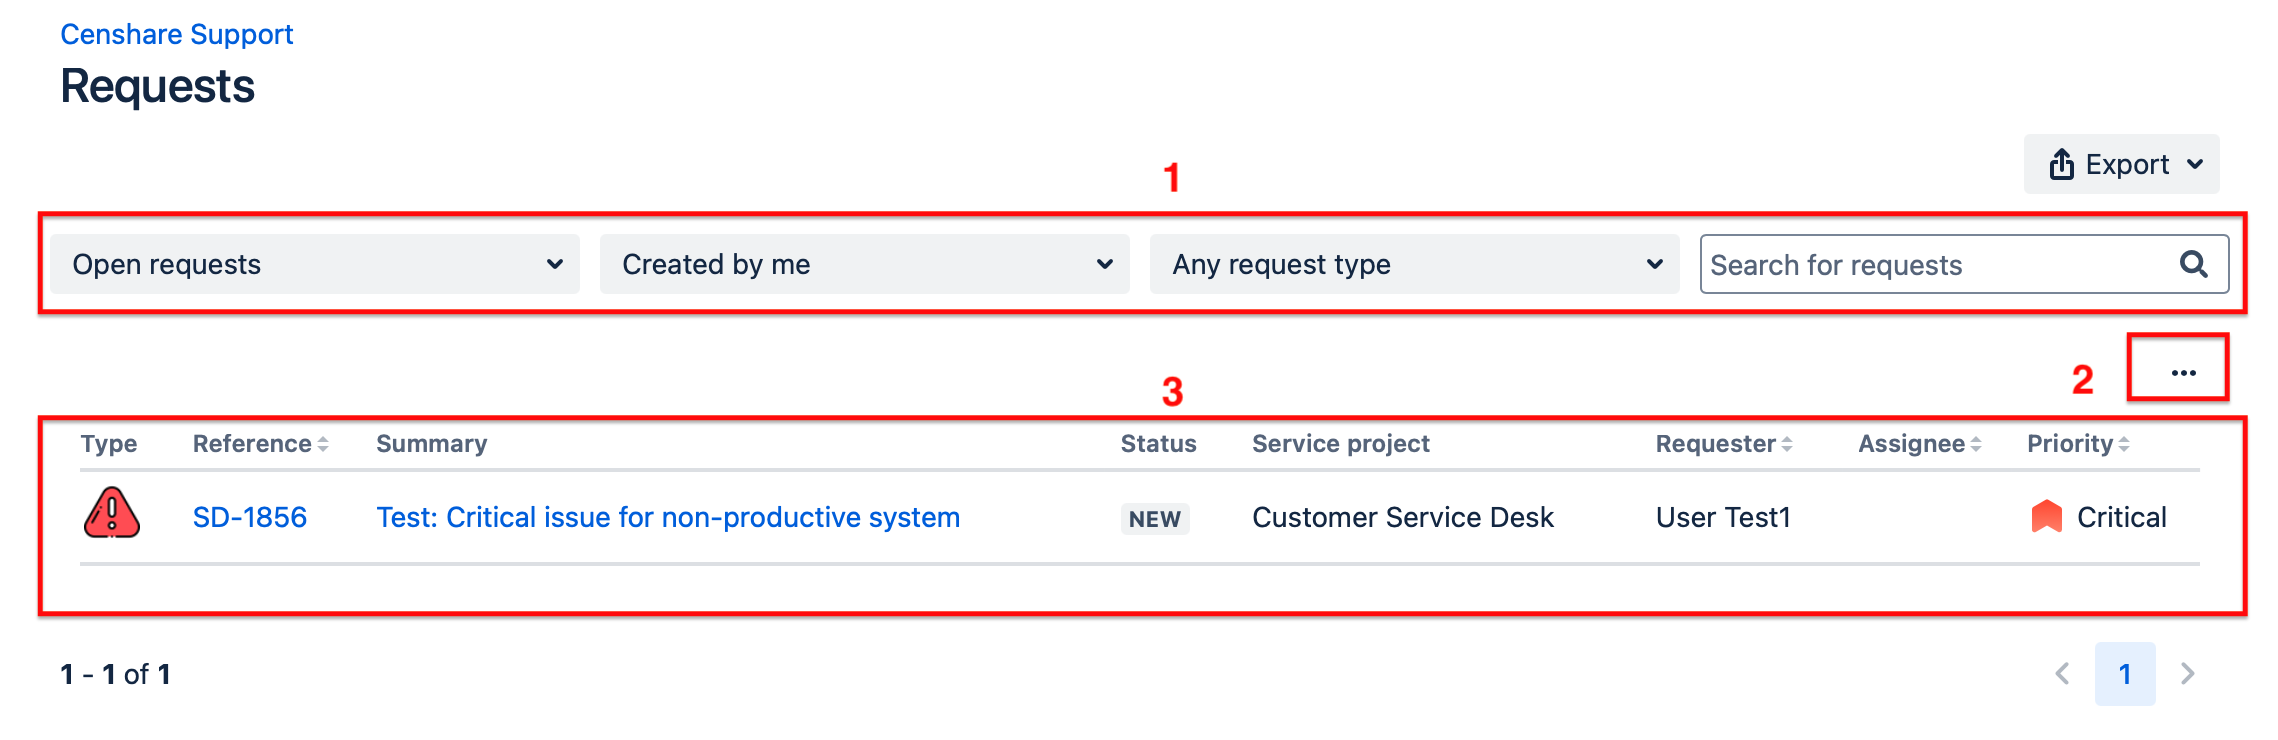
This area has three parts.
-
Filter and search for request
From the requests page you can filter your requests by the following parameters:
-
Request status - for example, open or closed.
-
Created by - for example, created by me or created by someone else, but shared with me.
-
Request type - for example, software requests or email access
-
The filter search will be performed immediately.
The "Search for requests" option executes your search term on the displayed ticket list. It basically runs a text search with your "<search term>" which searches in the Summary only. You have to click the return button to start the search.
-
Click on the 3 dots to setup the attributes shown in the result list
There are some options you can configure:
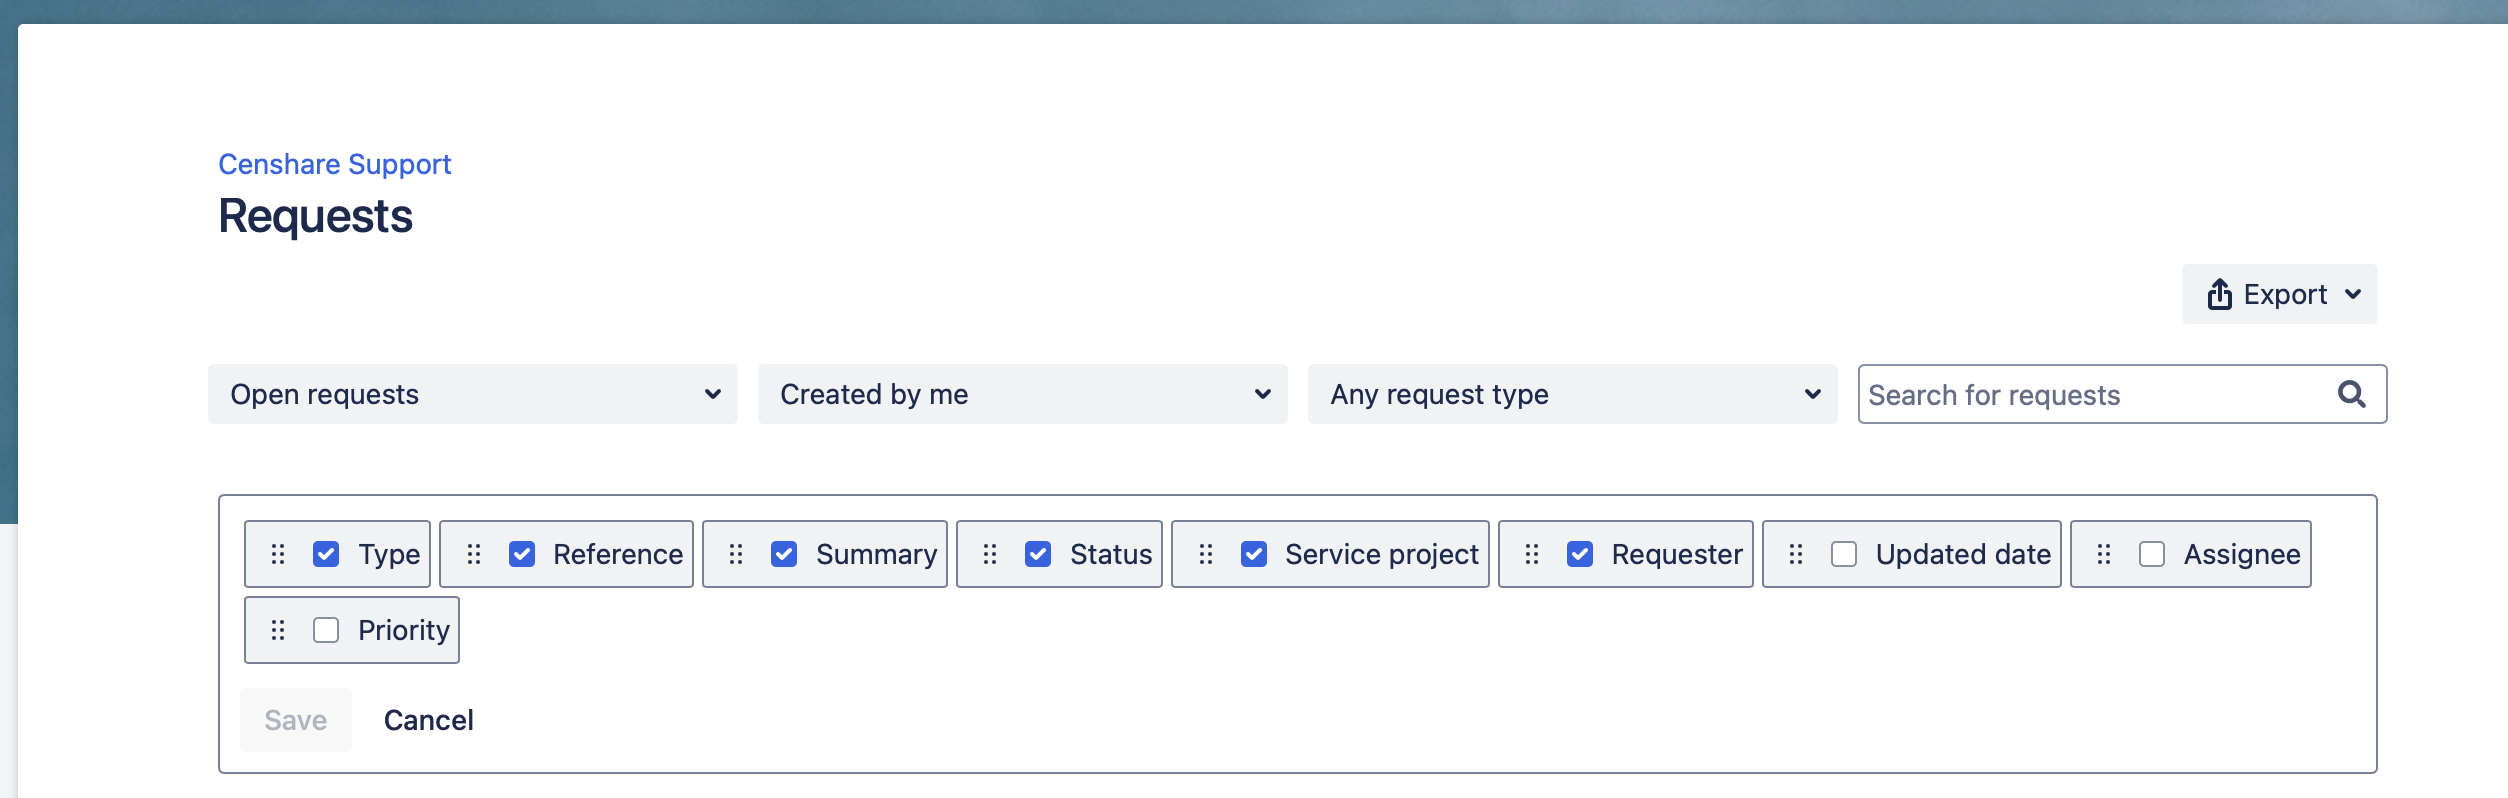
-
The requests in the results list
A request will be displayed on this page if you have created this request, or if you have been added as a participant to someone else’s request.
A single click on a request in the list will open it.
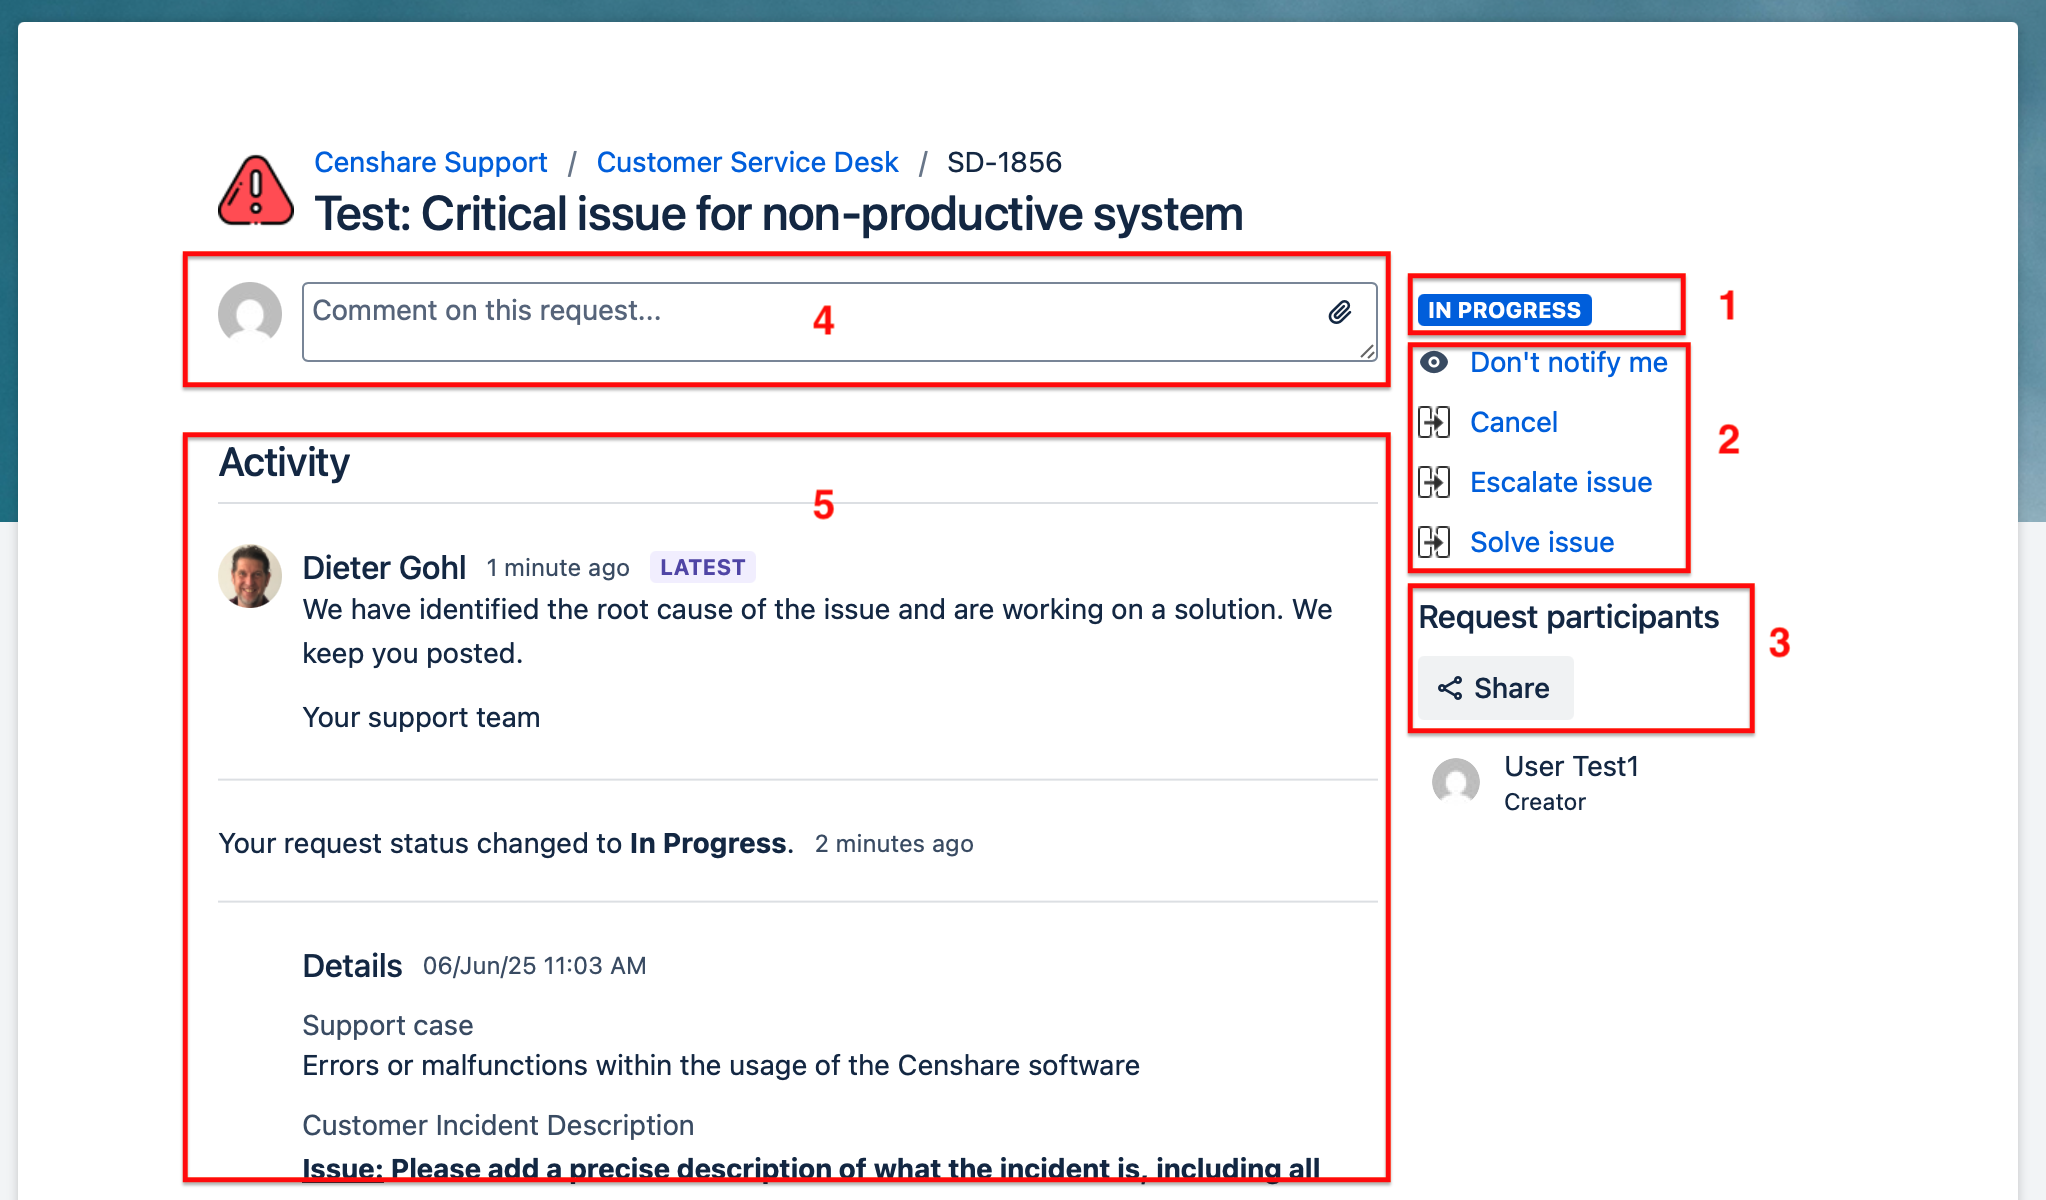
Edit requests in the Portal
An open request:
-
Workflow status. Check the documentation of the workflows below to understand the status.
-
Actions you can perform on the ticket. These are so called transitions, which let you change the status of the ticket and move it through the workflow.
The available transitions vary depending on the workflow status of the ticket and the involved partners.
Possible transitions:-
Don't notify me: Switch off all email notifications to you, connected to that issue
-
To Customer: Changes the status of the issue to “On Customer“ and sends an Email to the customers support group. A comment dialog appears and we strongly recommend writing a clear message for the customer.
-
To 2nd Level Provider: This transition is available if a partner is providing 2nd Level support. The transition changes the status of the issue to “On Partner“, assigns the partner company to the issue and sends an Email to the partner's support group. A comment dialog appears and we strongly recommend writing a clear message for the 2nd Level provider.
-
To IT Provider: This transition is available if a partner is providing the Censhare Cloud environment. The transition changes the status of the issue to “On Partner“, assigns the partner company to the issue and sends an Email to the partner's support group. A comment dialog appears and we strongly recommend writing a clear message for the IT provider.
-
To Web-IT Provider: This transition is available if a partner is providing the Online Solution (Web) environment. The transition changes the status of the issue to “On Partner“, assigns the partner company to the issue and sends an Email to the partner's support group. A comment dialog appears and we strongly recommend writing a clear message for the Web-IT provider.
-
To OS/HCMS Support: This transition is available if a partner is providing the Support for the Online Solution or HCMS. The transition changes the status of the issue to “On Partner“, assigns the partner company to the issue and sends an Email to the partner's support group. A comment dialog appears and we strongly recommend writing a clear message for the OS/HCMS Support provider.
-
Cancel: If the case is no longer relevant or obsolete, you can cancel it with this option and optionally tell us why in a subsequent dialog.
-
Escalate issue: Will set the status to "Escalated" and informs our support team about the escalation.
-
Solve issue: If you have solved the case by yourself, solve the issue using this option and let us know how you solved it in a subsequent dialog.
-
-
Add participants to share the ticket with others
-
You only can share with users that have the permissions to access the ticket
-
All participants are listed bellow the share option
-
-
Comment on this request. Add additional information, comments, or attachments. Afterwards, the issue will be set to status “NEW“, and the Censhare Service Desk will check the ticket.
-
To attach a file you simply can drag & drop it to any place of the ticket area
-
-
The list of all activities and comments, done so far with the ticket
The workflow status
Possible workflow status for Incident and Service Request:
|
Status |
Meaning |
|---|---|
|
NEW |
The ticket is in the inbound and waits for being picked for processing by a Censhare Support Agent. |
|
IN PROGRESS |
A Censhare Support Agent is working on the ticket. |
|
ON PARTNER |
Partner must take action. The ticket is waiting for an update from one of the partner's users. |
|
ON CUSTOMER |
Customer user must take action. The ticket is waiting for an update from one of the customer’s users. |
|
ESCALATED |
You have escalated the issue and it is with the Censhare Support Agent. |
|
SOLVED |
The Censhare Support Agent has provided a solution to you or you have solved it and changed it to this status.
|
|
PENDING |
The processing Censhare Support Agent is waiting for information from another party and can't make progress at the ticket. |
|
CANCELED |
The creator or the Censhare Support Agent has canceled the ticket. Means it's no longer valid because of an already found solution or it's no longer relevant. |
|
IN REVIEW |
Critical issues are always reviewed by our support organization after a solution has been provided. This ticket is currently under review. |
|
CLOSED |
This is the final status of a ticket. After it was set to the status SOLVED or CANCELED, it will automatically be set to CLOSED after some time. |
Possible workflow status for Change Request:
|
Status |
Meaning |
|---|---|
|
REVIEW |
The Change Request is in the inbound or an initial review. |
|
PLANNING |
The Change will be planned. |
|
CENSHARE APPROVAL |
The processing team is seeking for internal approval from the internal stakeholders. |
|
CUSTOMER APPROVAL |
The processing team is seeking for Customers approval for the planned work and schedule. |
|
AWAITING IMPLEMENTATION |
Change is approved and planned. |
|
IN PROGRESS |
Change is in progress / is being implemented. |
|
ON PARTNER |
Partner must take action. The ticket is waiting for an update from one of the partners user. |
|
ON CUSTOMER |
Customer must take action. The ticket is waiting for an update from one of the customer users. |
|
COMPLETED |
Change was successfully implemented. |
|
POST IMPLMENTATION REVIEW |
Certain circumstances may require a review of a Change. Then it is set to this status. |
|
DECLINED |
The requested was declined. |
|
CANCELED |
The Requester or the Team has canceled the request. Means it's no longer valid. |
|
CLOSED |
Is the final status of a Change Request. |
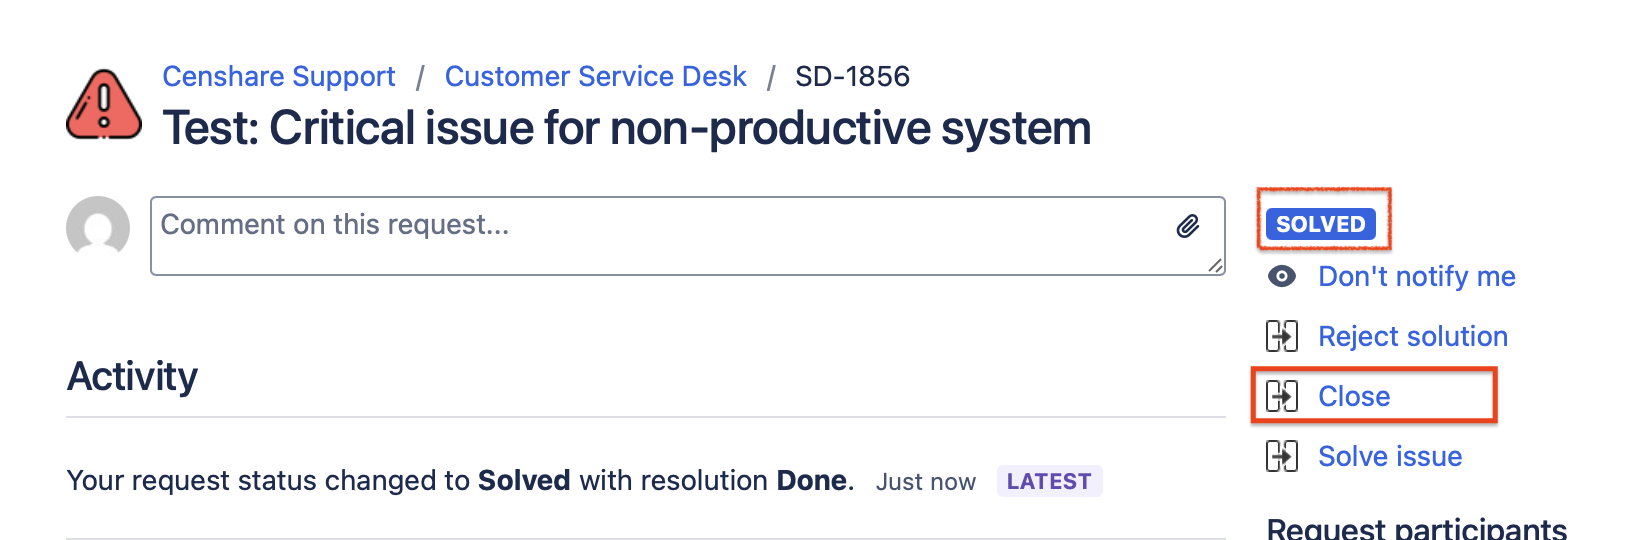
Close requests
Options available to close the issue depend on its current status.
If the issue is already in the status "Solved", you can finally close it with "Close":
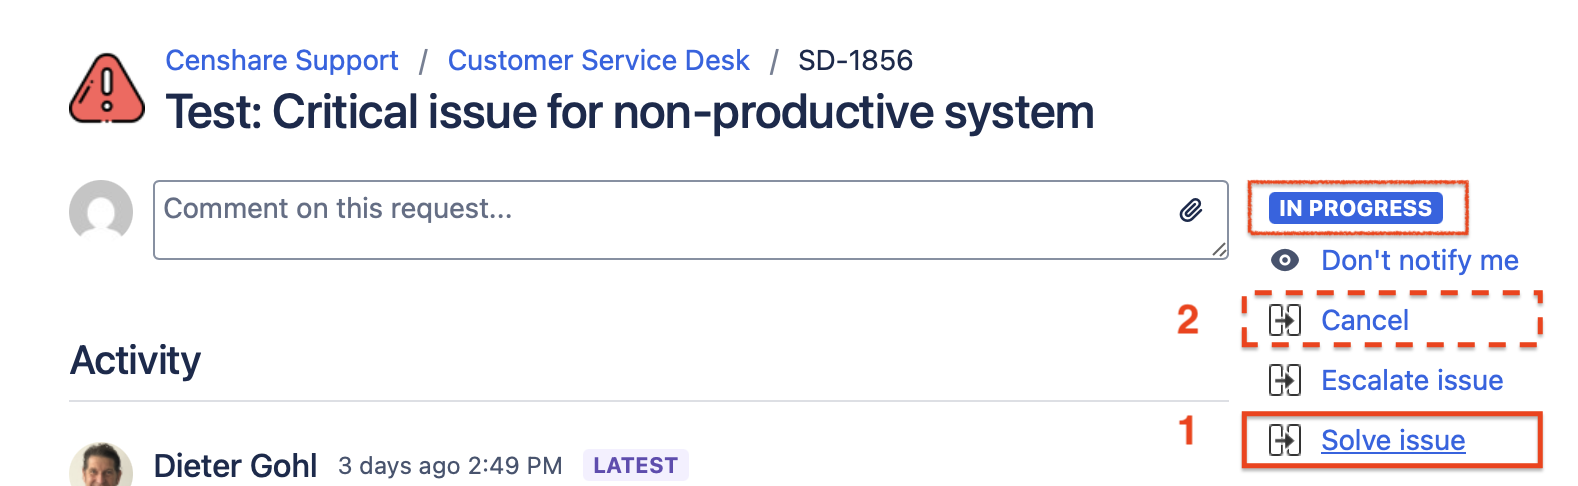
If the issue is in the status "In Progress"
-
Choose “Solve issue” to close resolved issue.
-
If the issue is outdated or obsolete, close it with "Cancel".
Notifications
How do notification work in general
Notifications allow Jira to send email notifications to specified people regarding particular events in a project.
Users receive a separate notification for each event.
Events are, for example:
Ticket created
Ticket assigned
Ticket updated
Ticket closed
and so on...
There are three specified people available as receiver:
-
All Watchers → All users who are added as participants.
-
Current Assignee → A user to whom the ticket is currently assigned.
-
Reporter → The ticket’s creator.
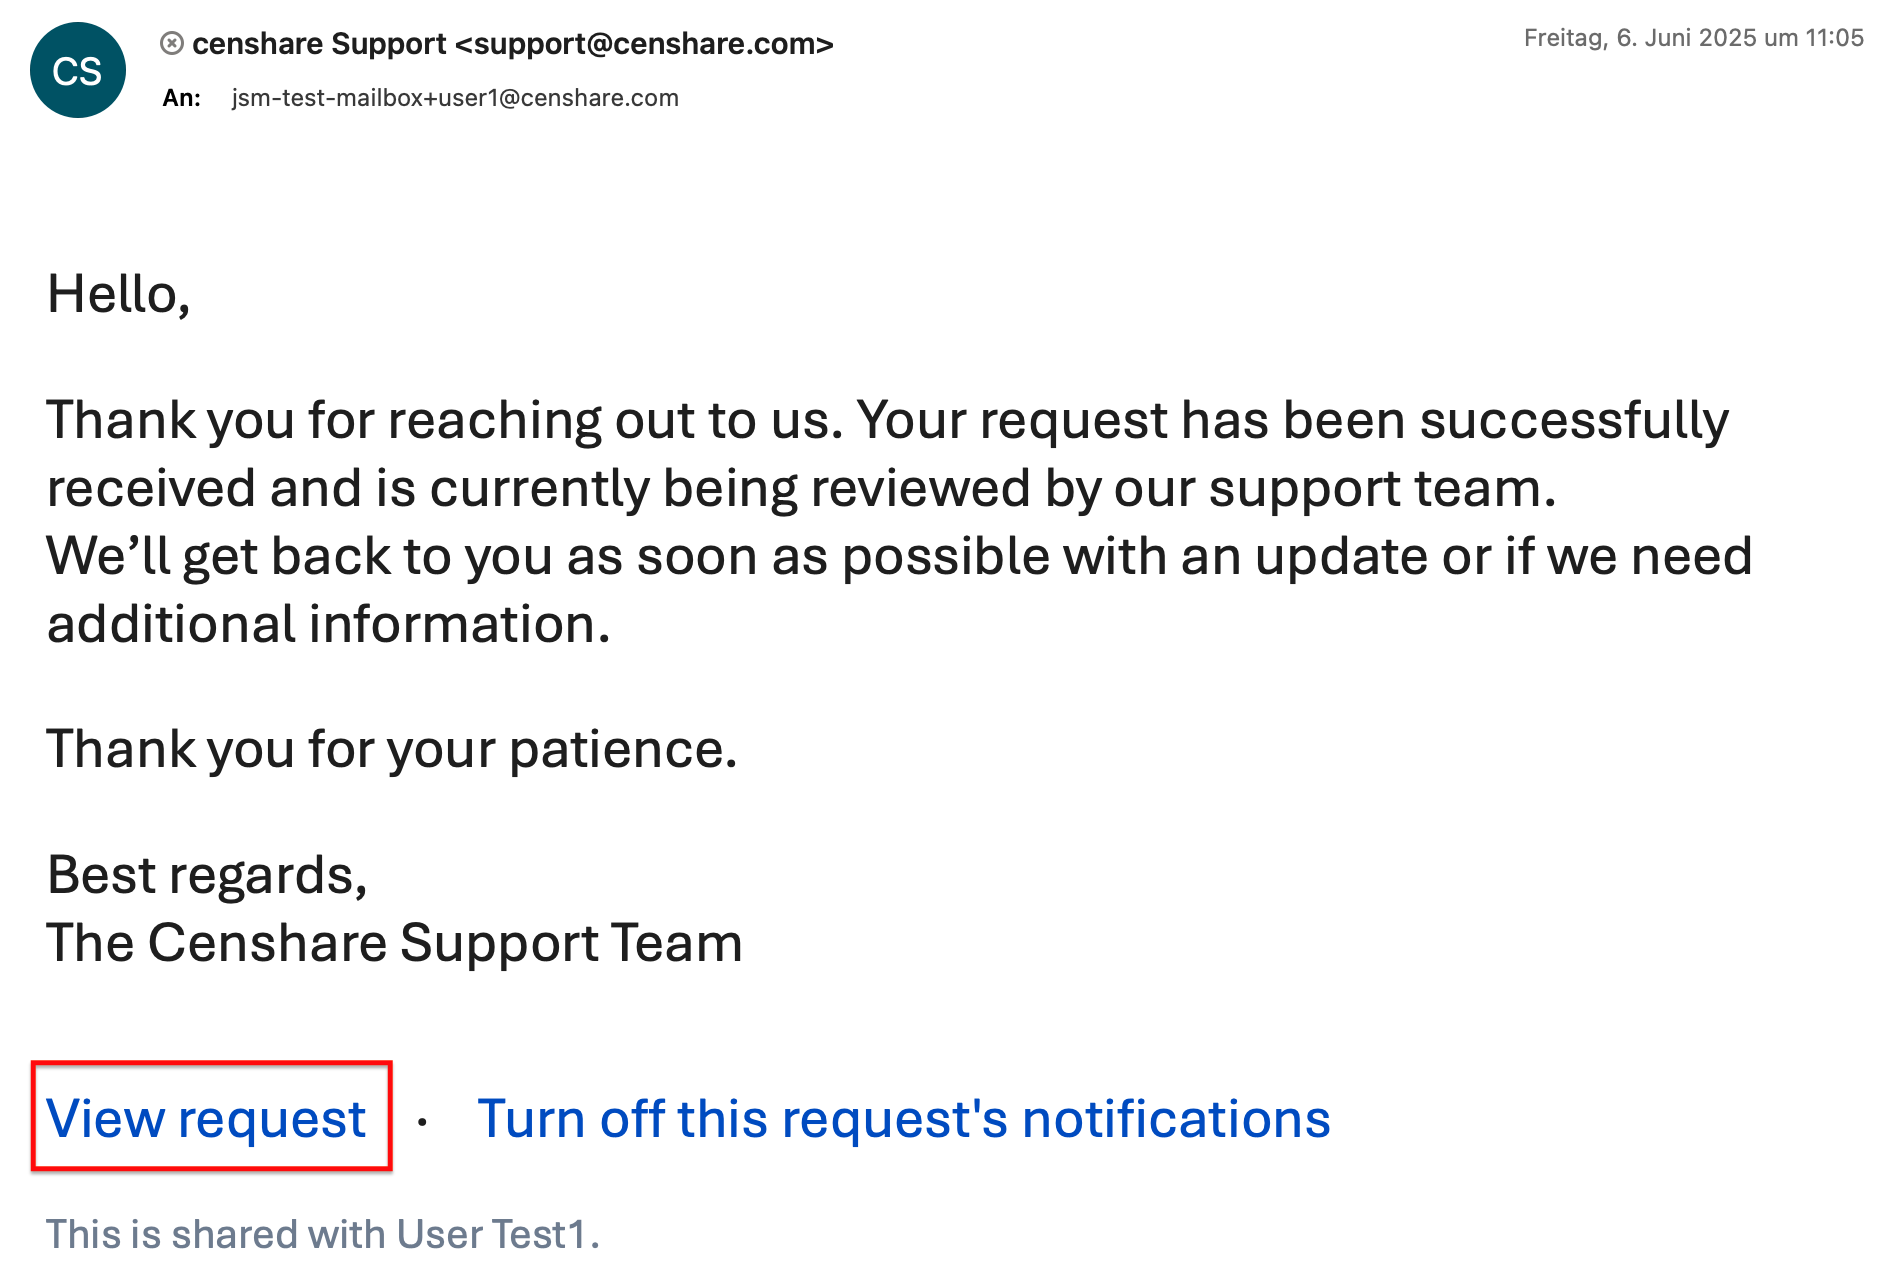
Example email - After creation of a new request:
Example email - Request status has been changed:
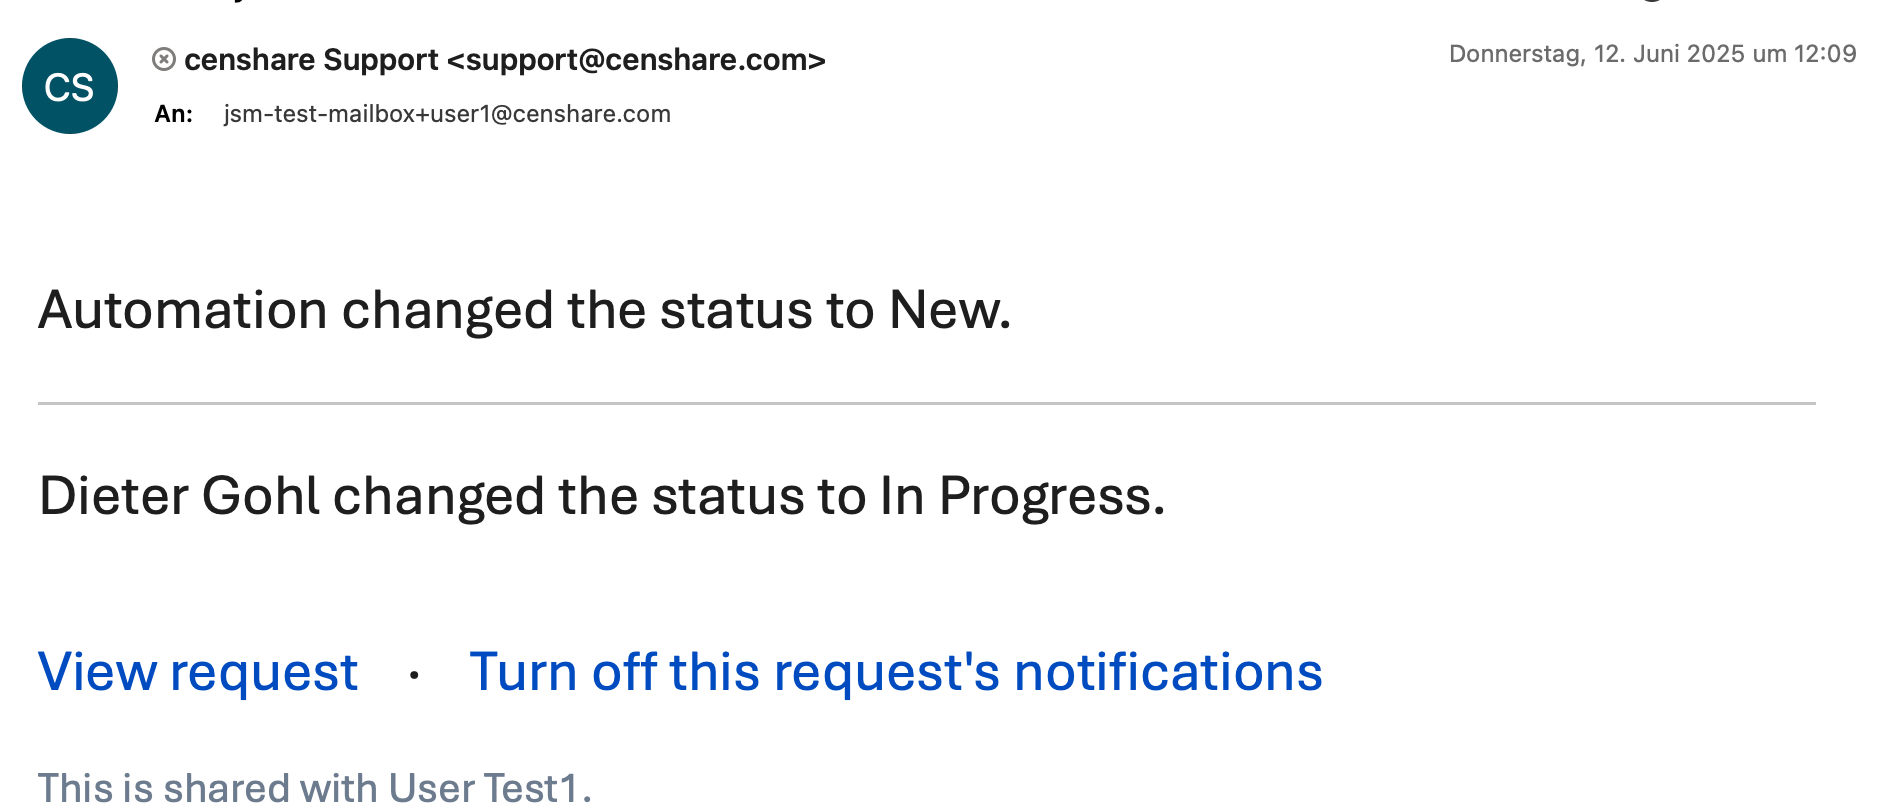
Note that one status email can have more than one ticket actions or changes included.
Email Notification for Feedback
|
It is not possible to reply to teh ticket emails. If you want to immediately react to the notification, please use the direct link within the ticket email to open the ticket on the portal. |
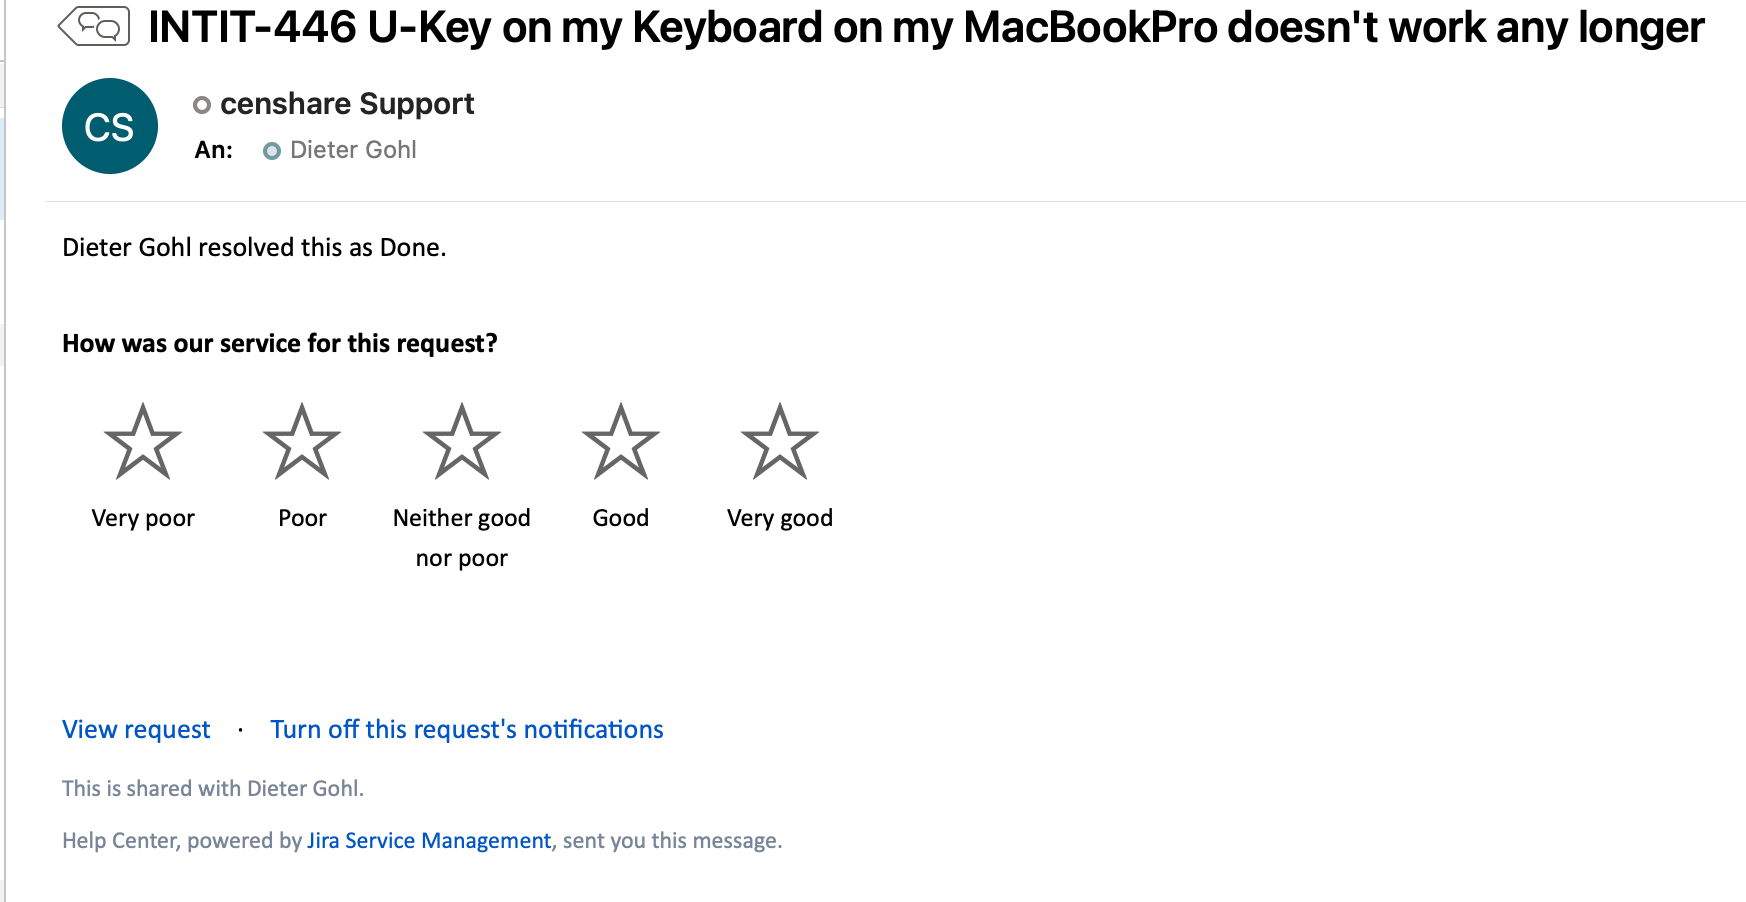
Ticket feedback
|
Because your opinion matters. |
As soon as a ticket has been solved or canceled, a process for evaluating and commenting on how we have handled your ticket starts automatically.
This feedback mechanism consists of 2 steps.
Step 1: The requester receives an email based on the closing event. In this email, you have the possibility to rate the processing via a star bar.
Simply click on the stars in the email and the rating will be transmitted to the system immediately and stored within the ticket.
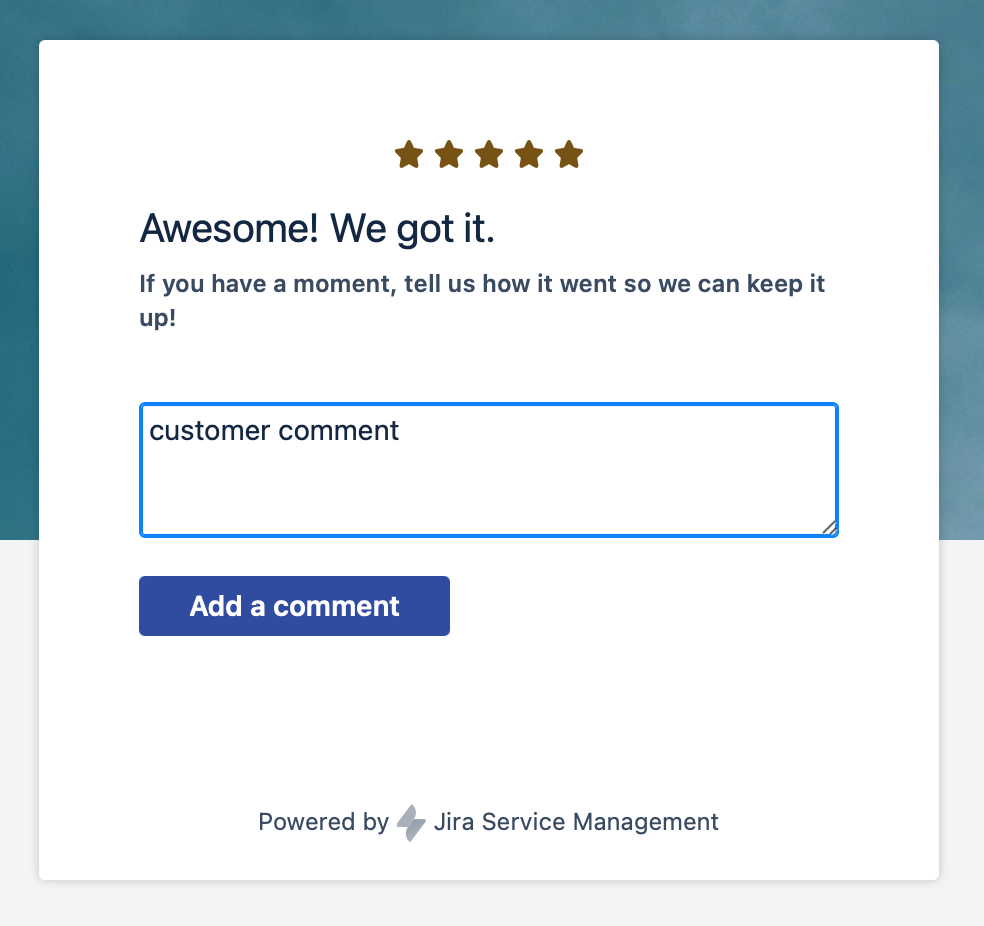
Step 2: At the same time, with the click on the stars bar, you will be linked to an online form. Here you can readjust the star rating and additionally leave a comment.
If you readjust the star rating, it will be submitted to the system immediately.
If you write a comment, click the "Add a comment" button and your comment will be stored in the ticket.
My Profile
Access to you personell data at the system.
Next to the "Request" button at the top right corner of the portal window, you can find the link to your profile data and the logout function.
In the profile window you have the option "Edit your profile" in the upper right corner of the window to change your profile settings like your Avatar or the GUI language.
|
English is the default language of the implementation. If you switch to German language in your profile, only the default items are translated to German. All individual texts and items still shown in English language.
|
Change your Avatar
After you have selected "Edit your profile" you are in the edit mode. Now you can select "Change avatar" and you will get the "Upload Avatar" dialog to select or drag & drop an image to be used as your avatar.
Please note that the maximum allowed image size is 2000px * 2000px. Otherwise the upload will fail and you will get an according error message.